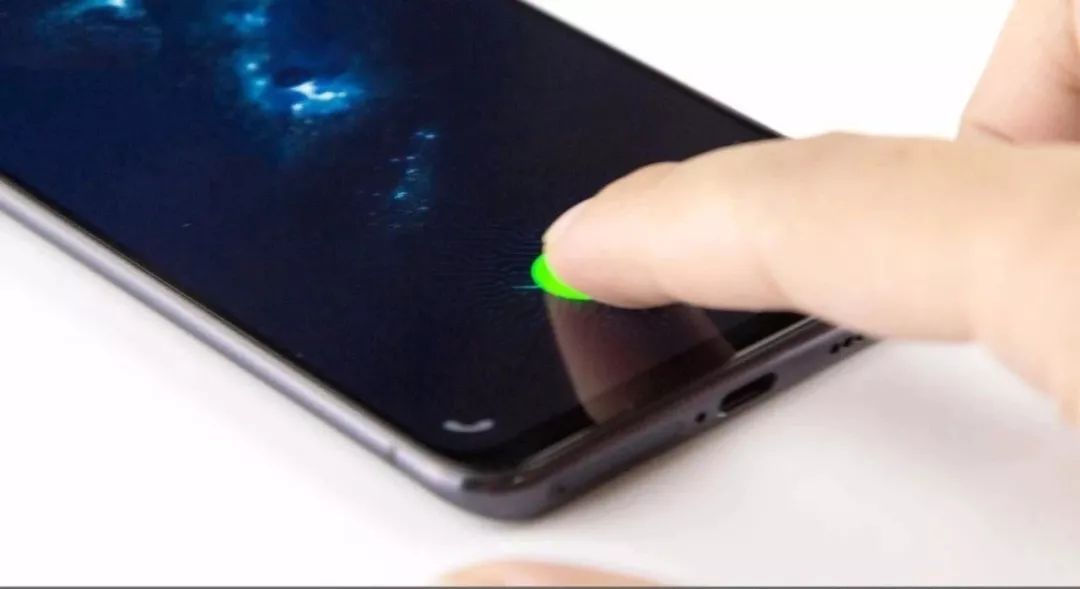
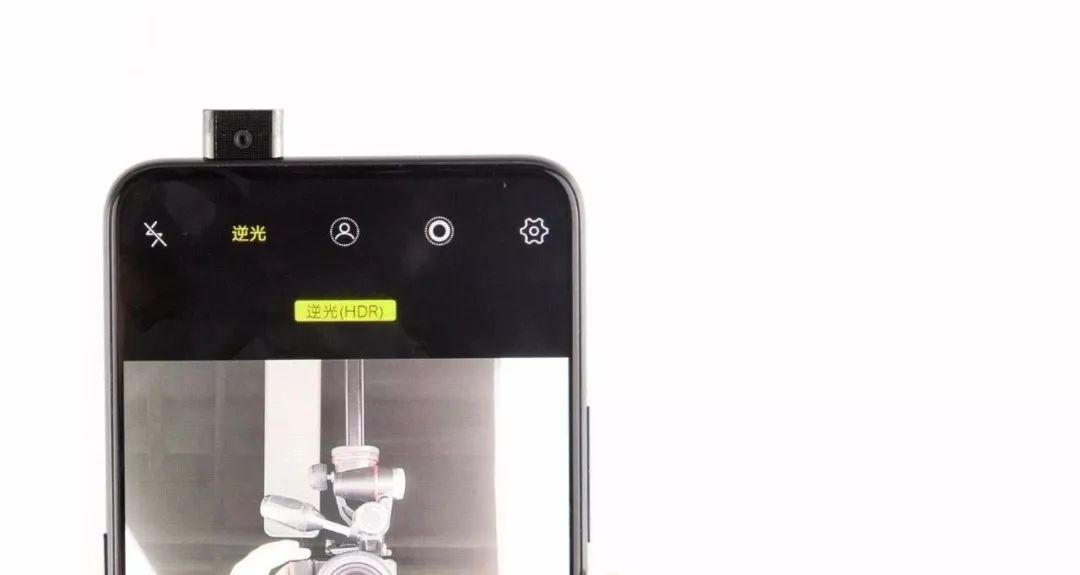
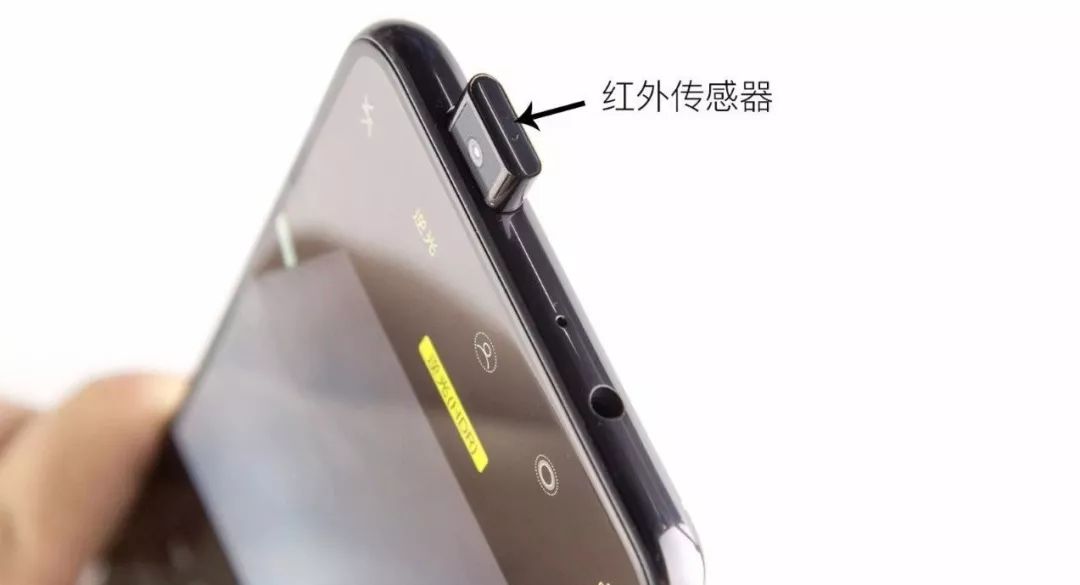
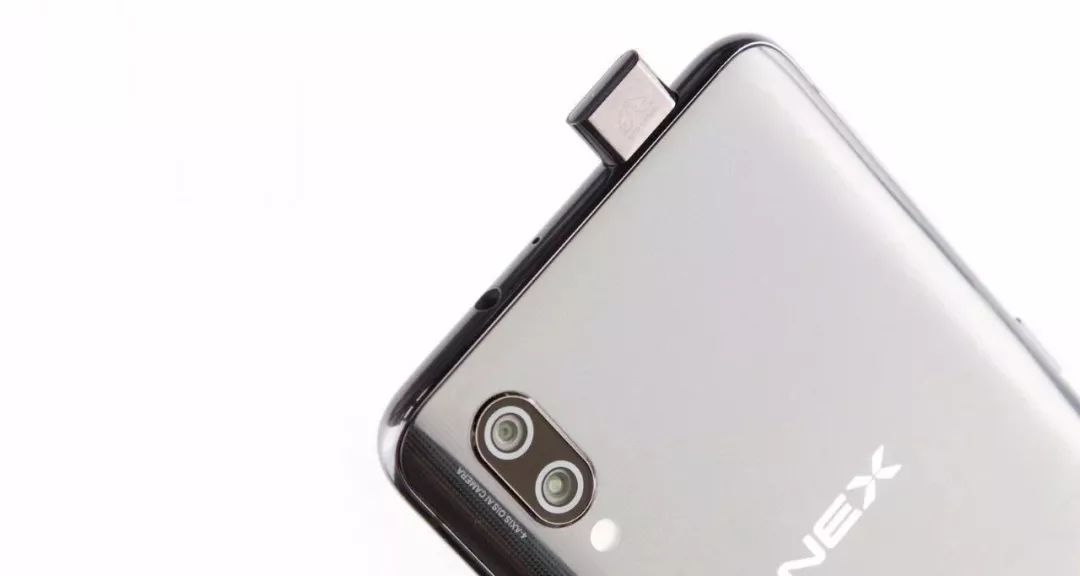
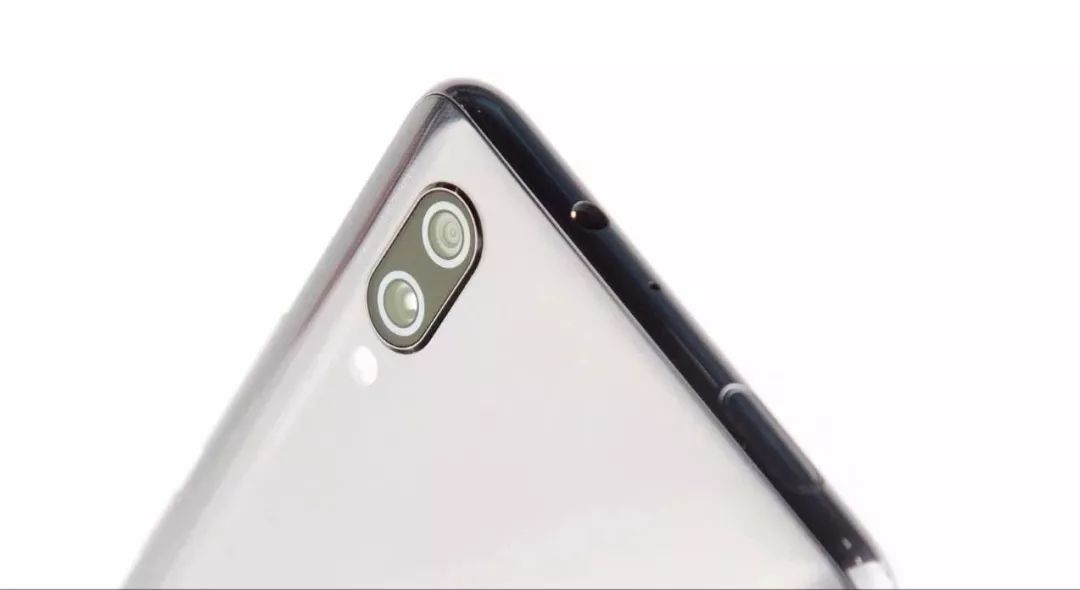
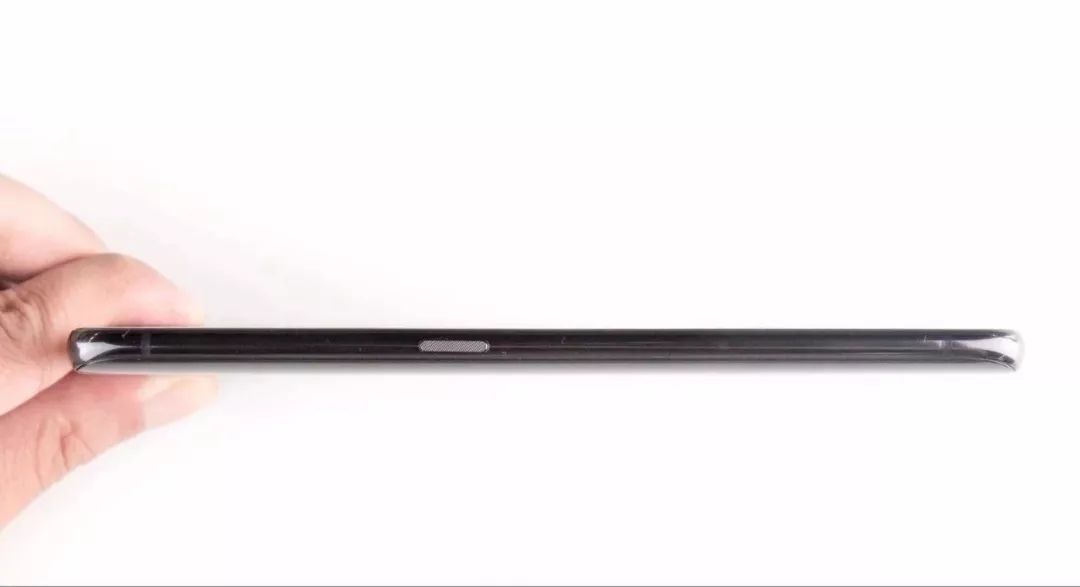
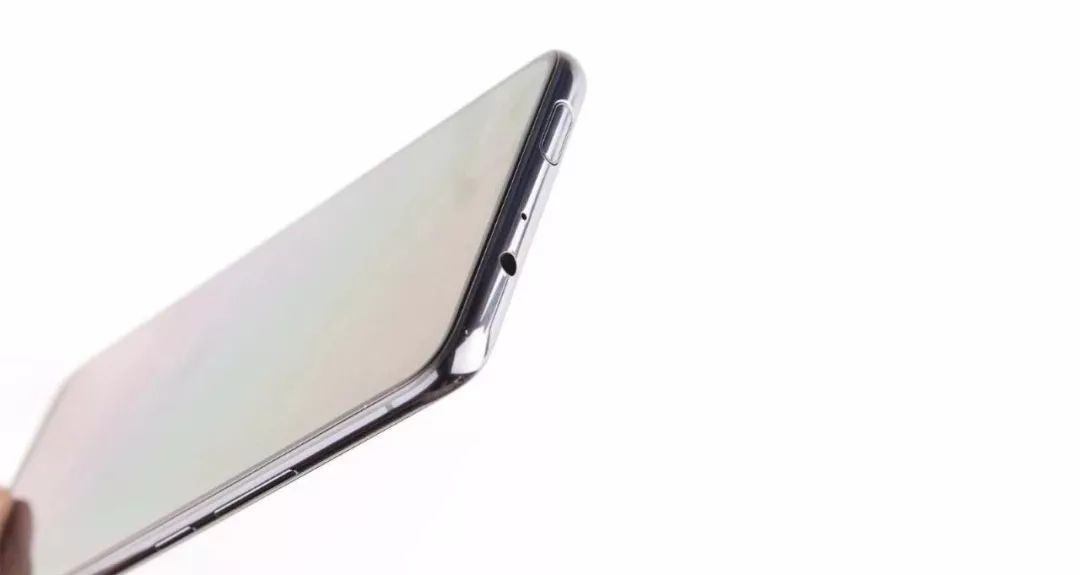
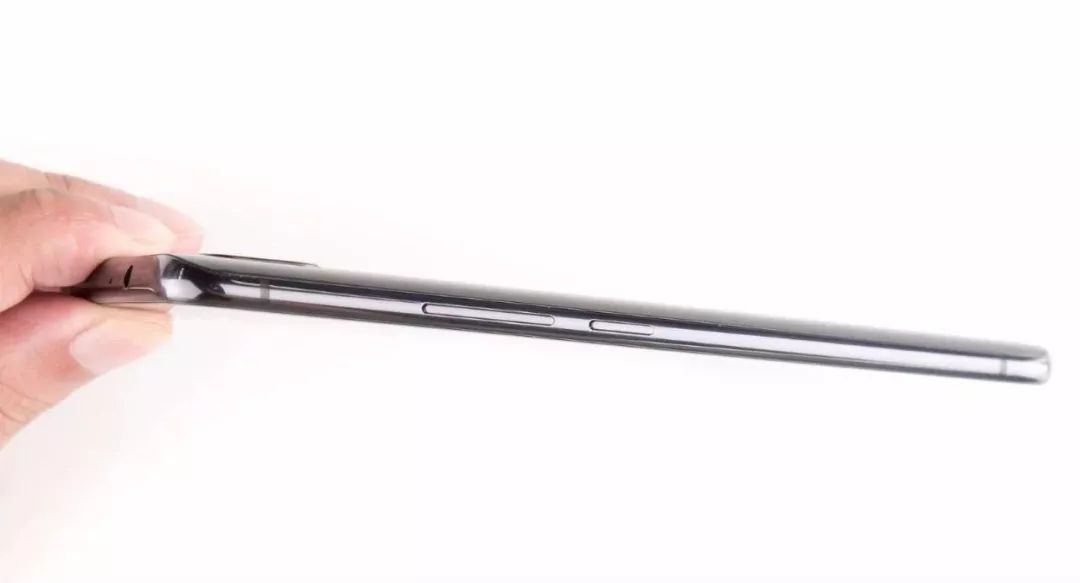
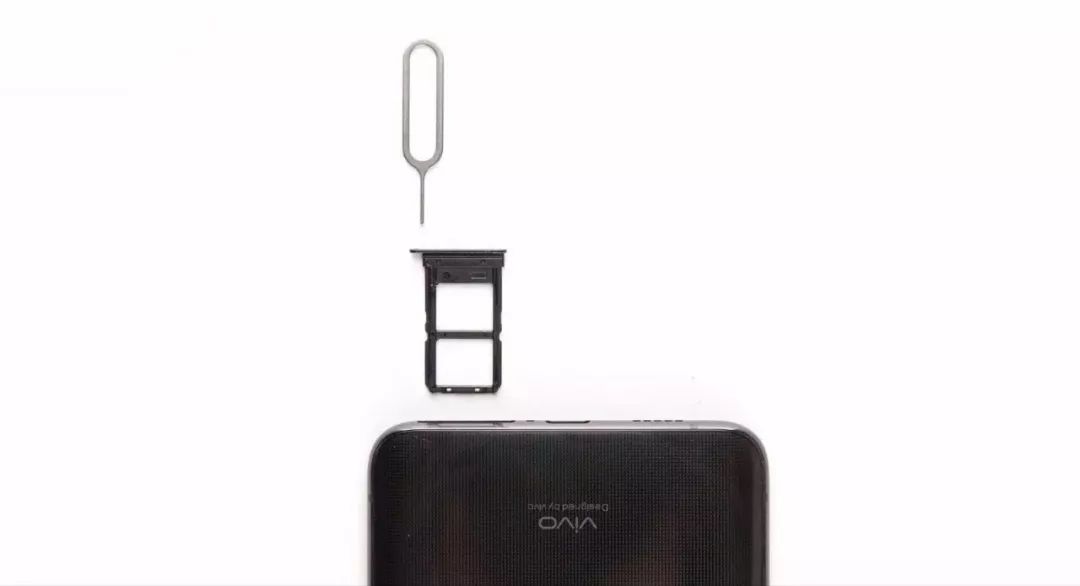
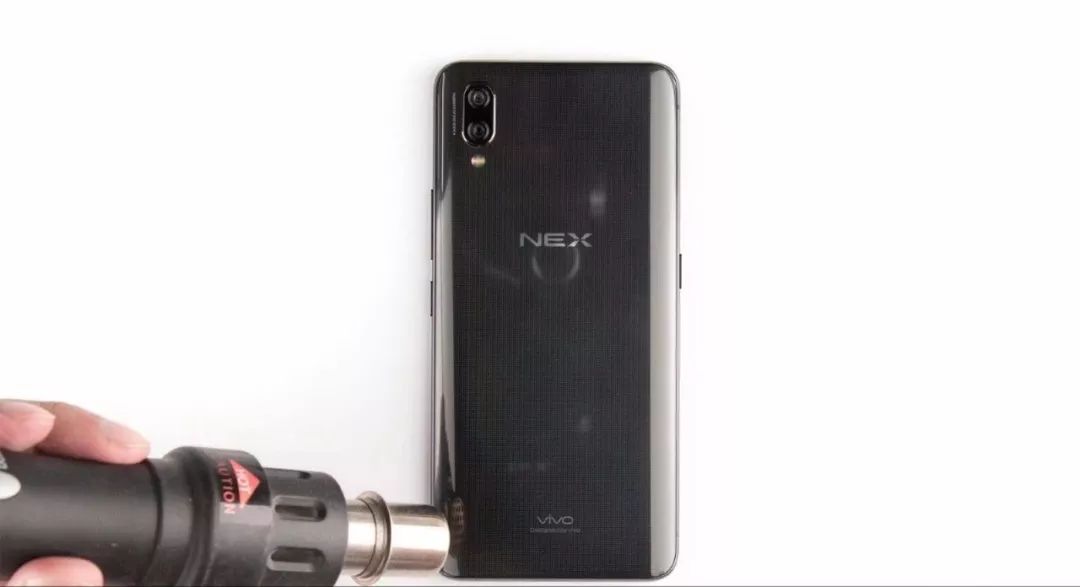
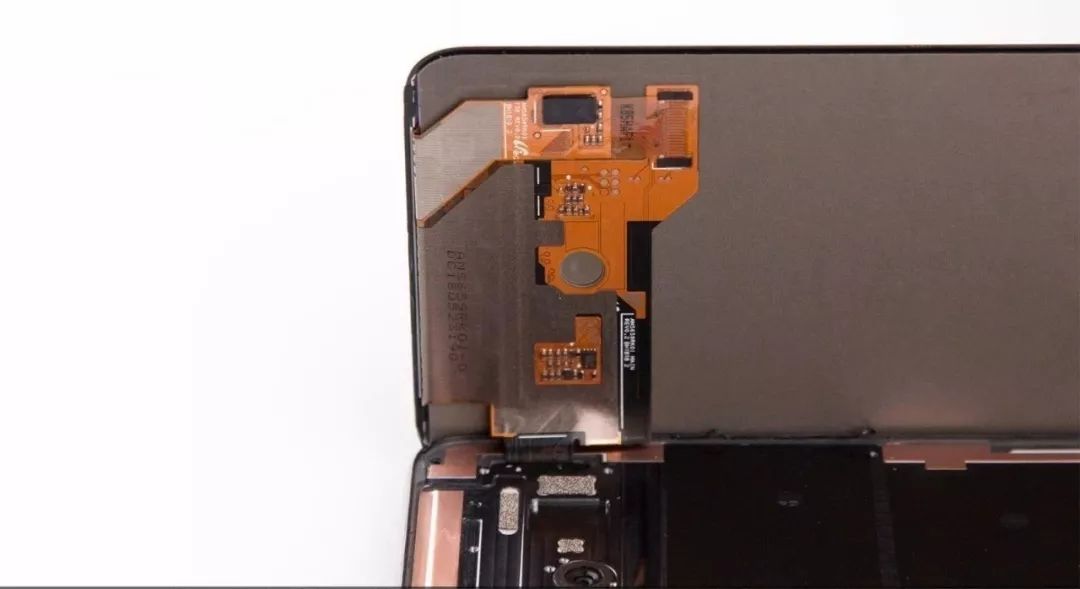
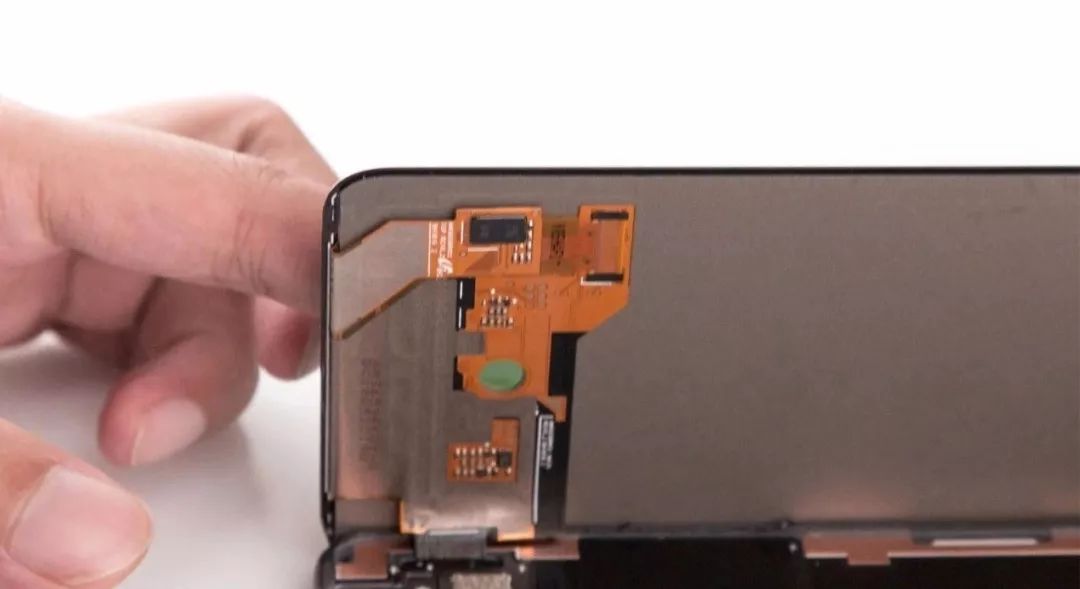
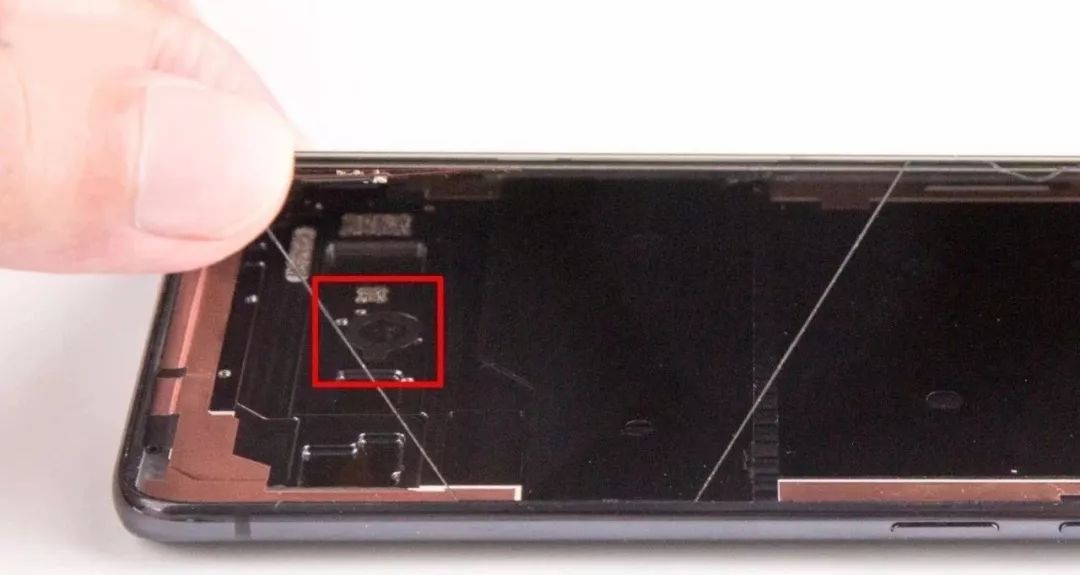
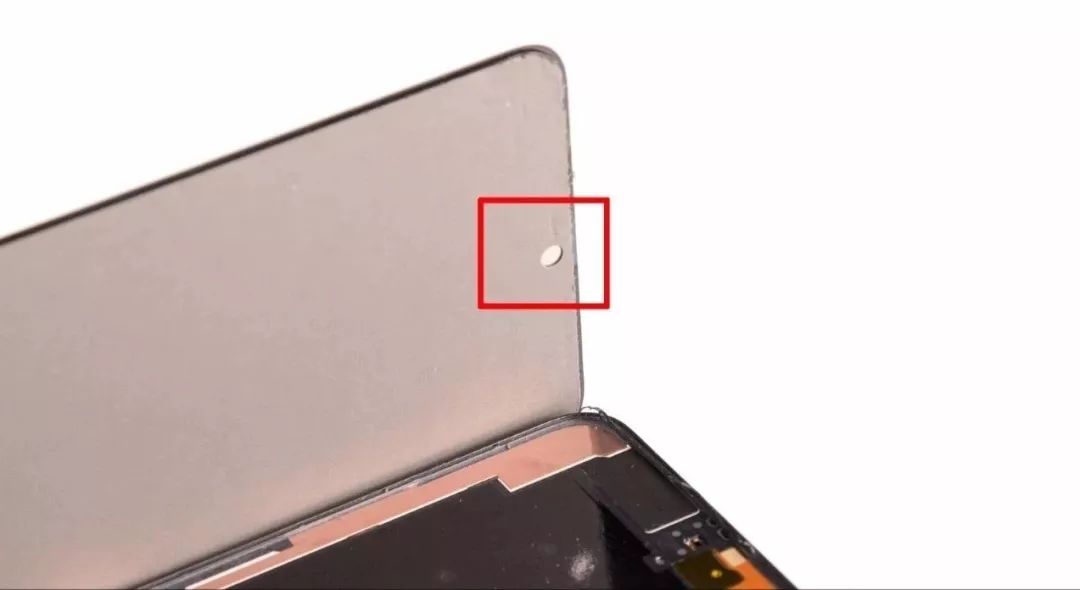
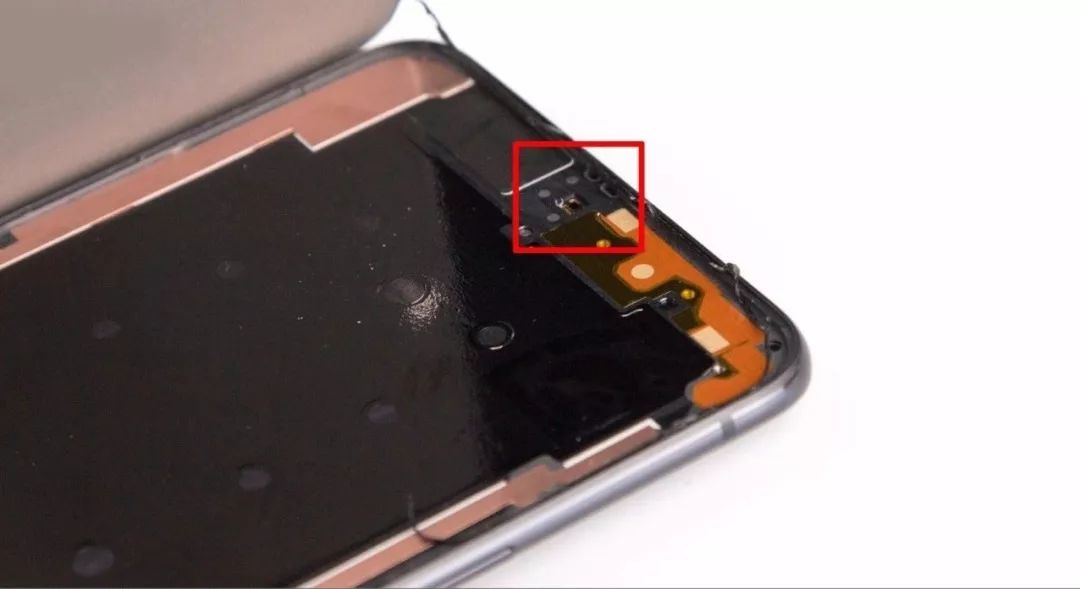
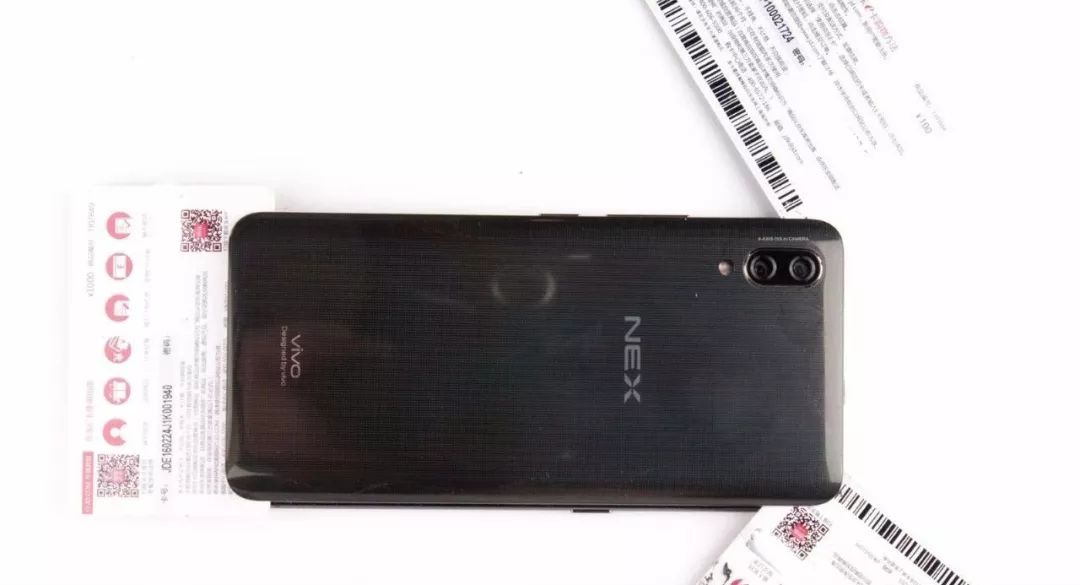
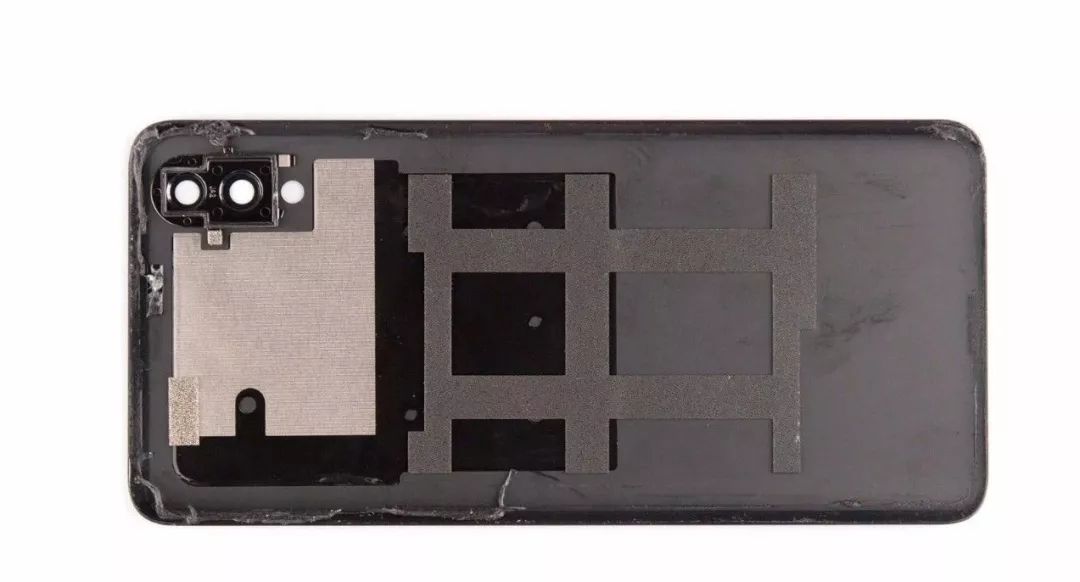
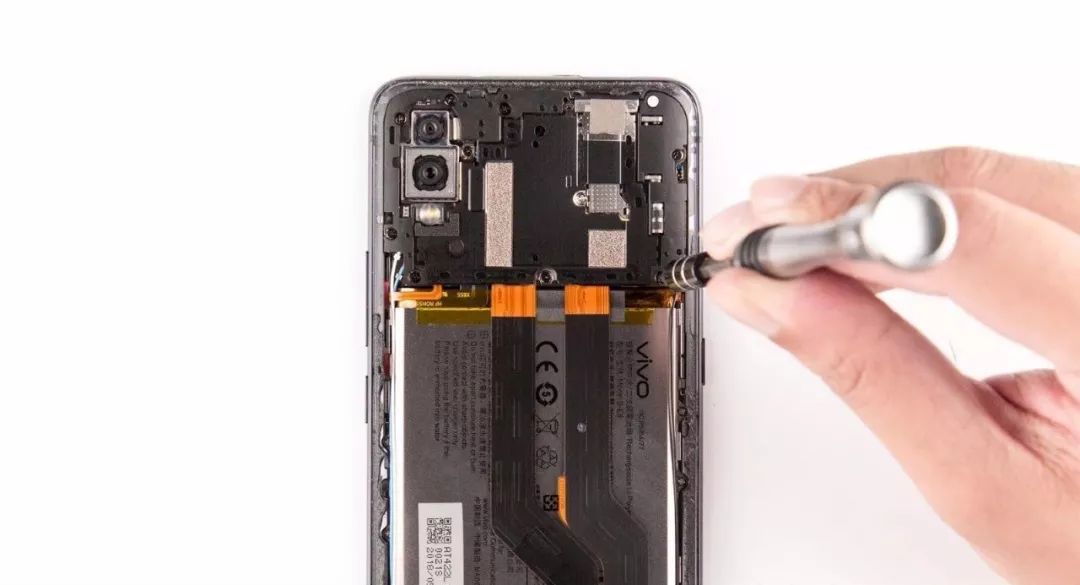
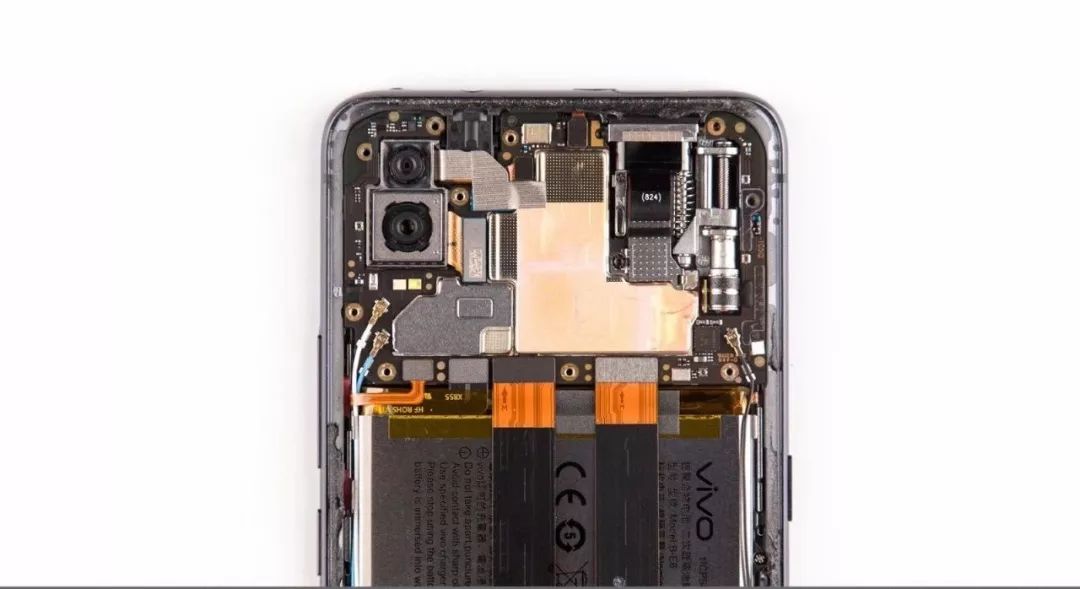
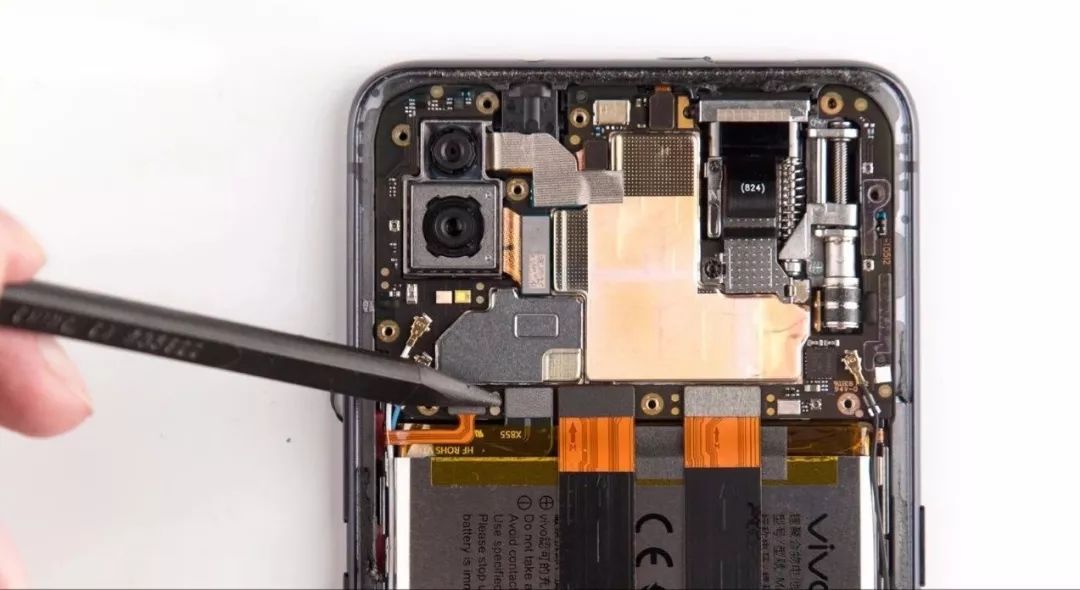
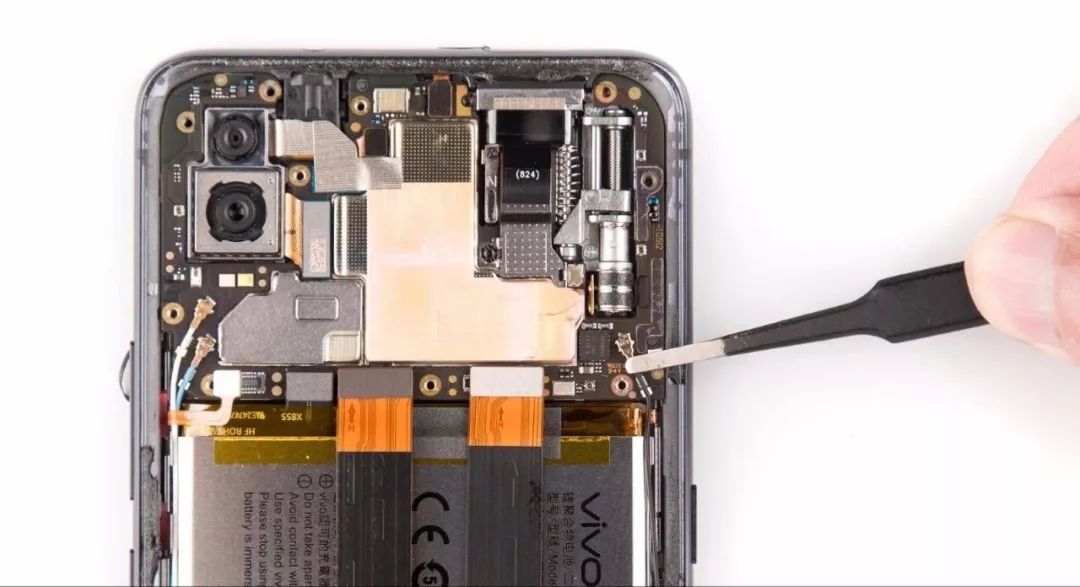
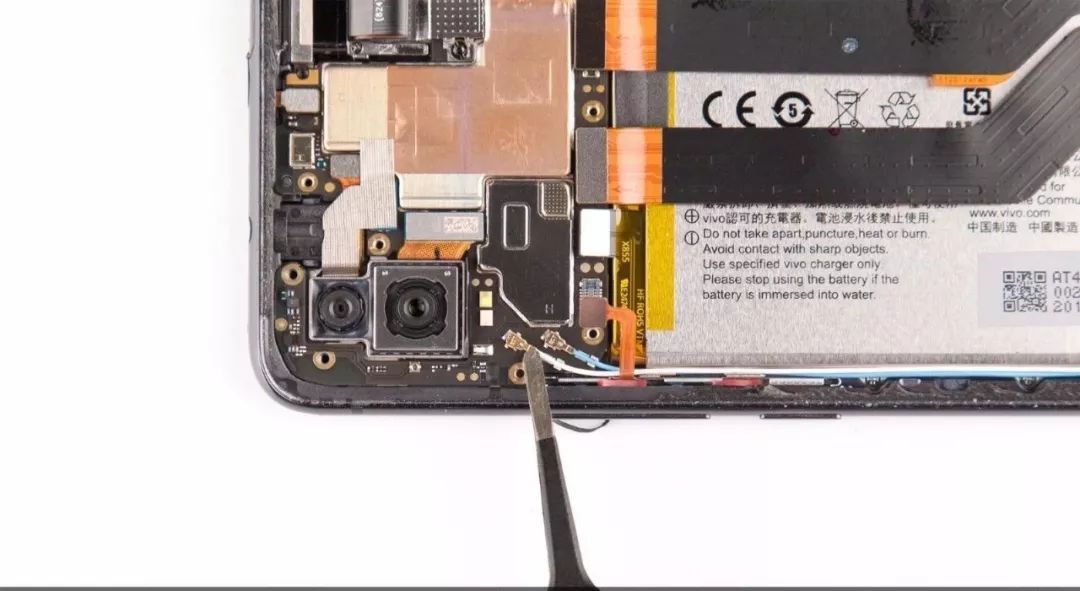
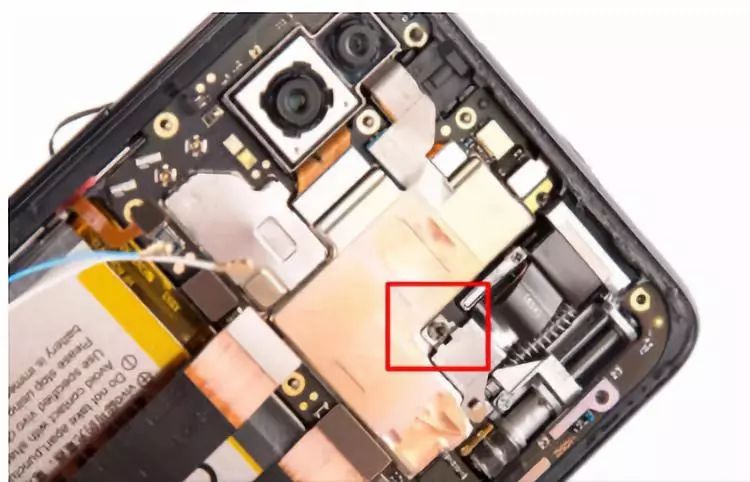
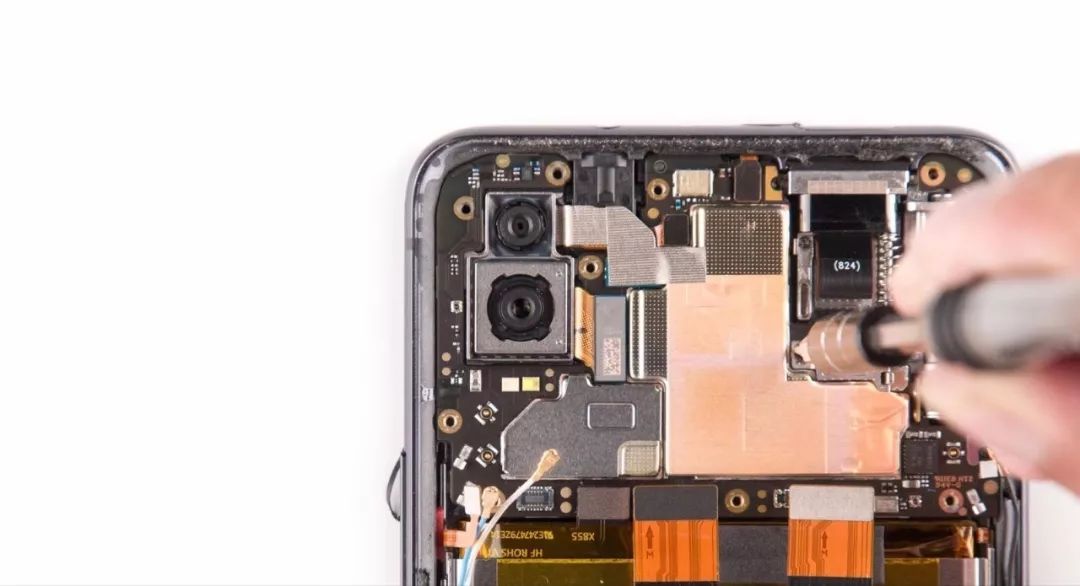
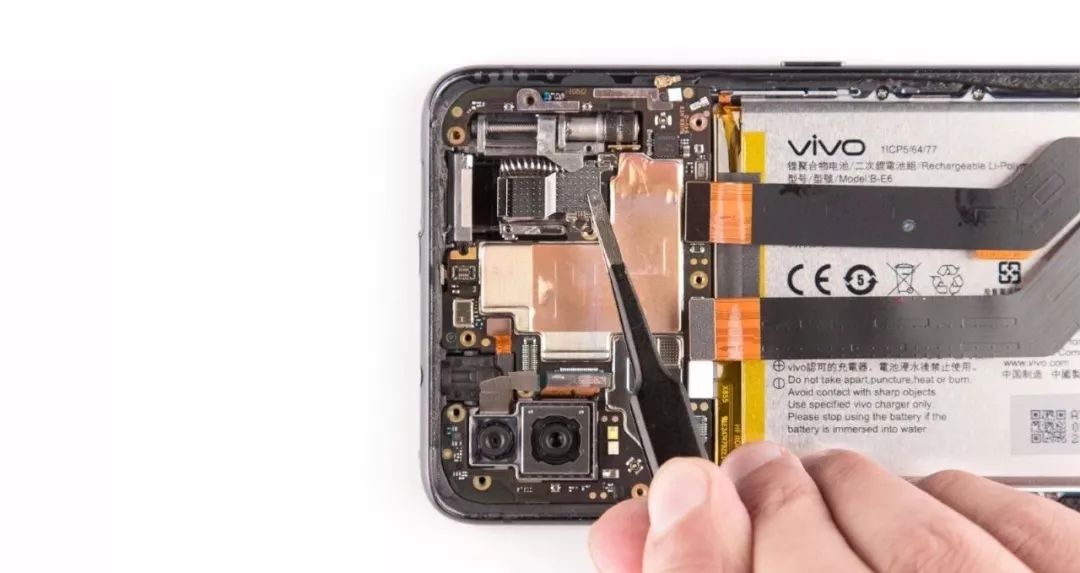
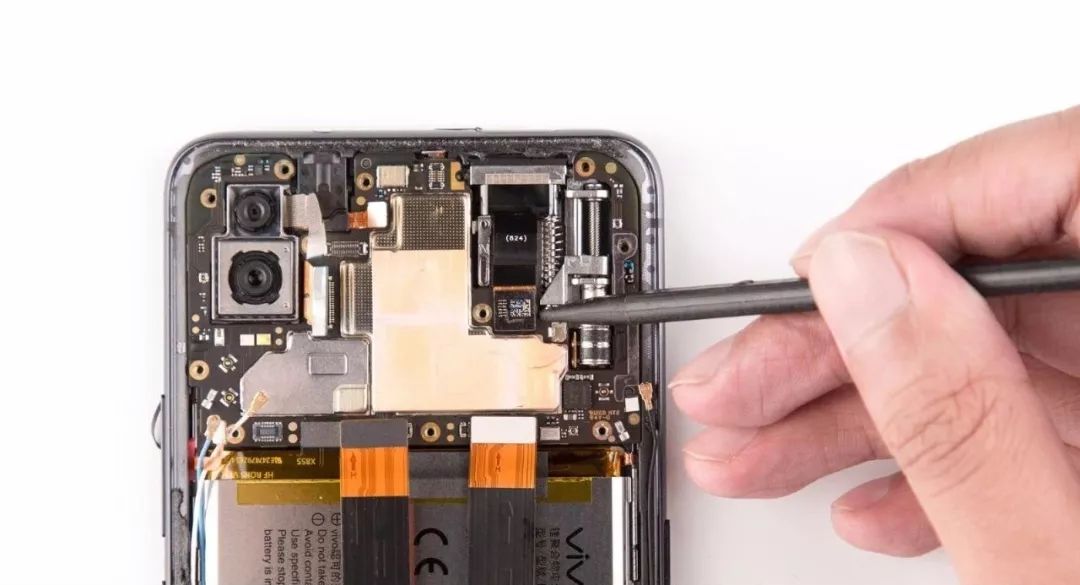
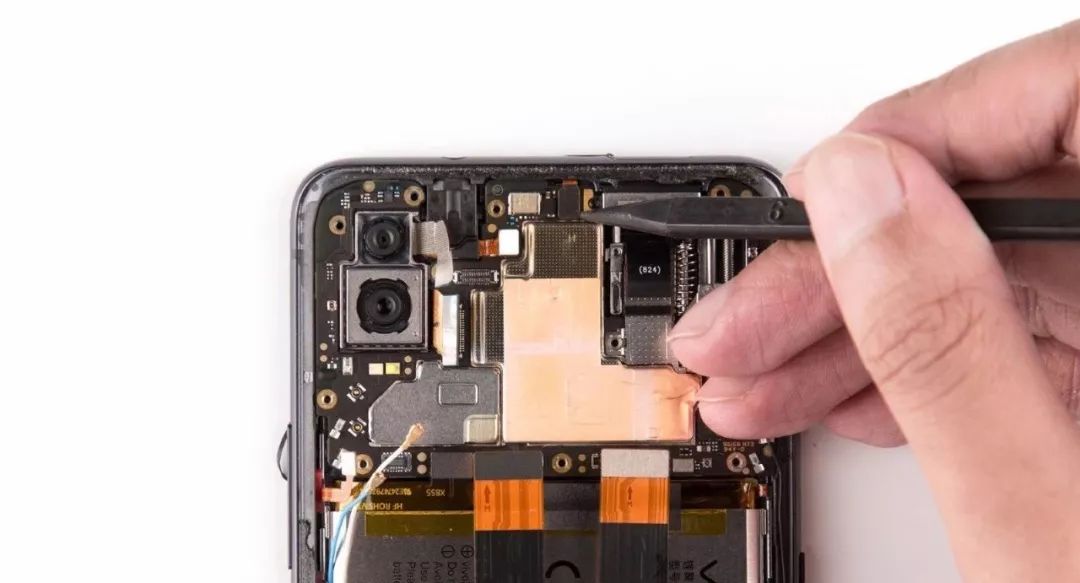
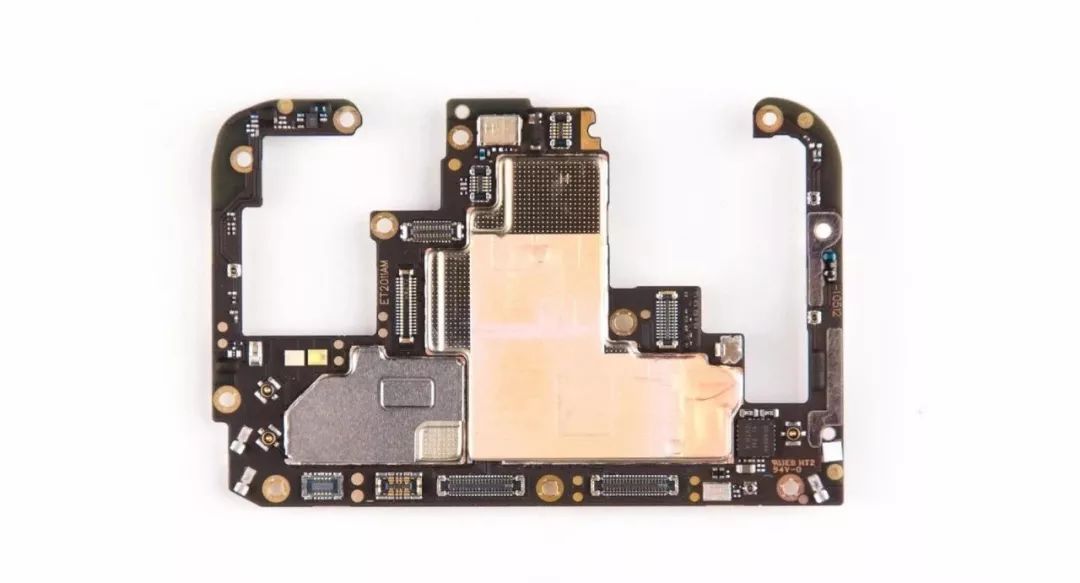
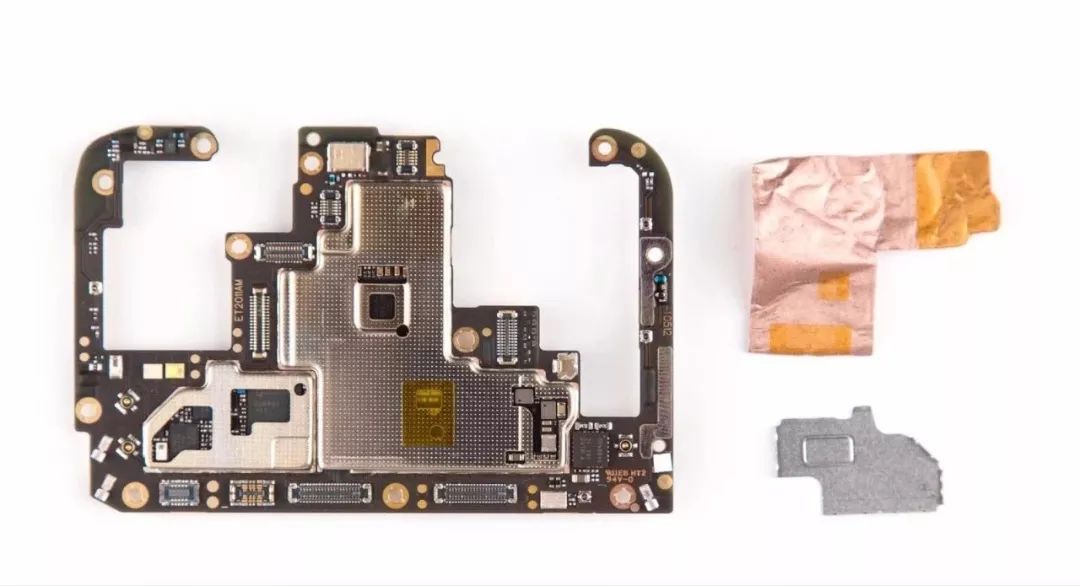
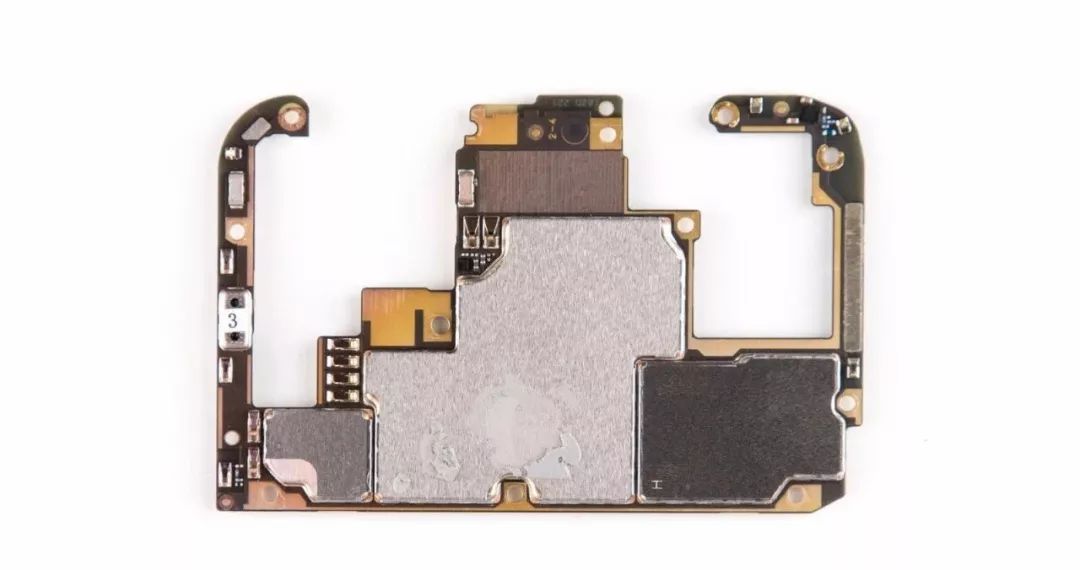
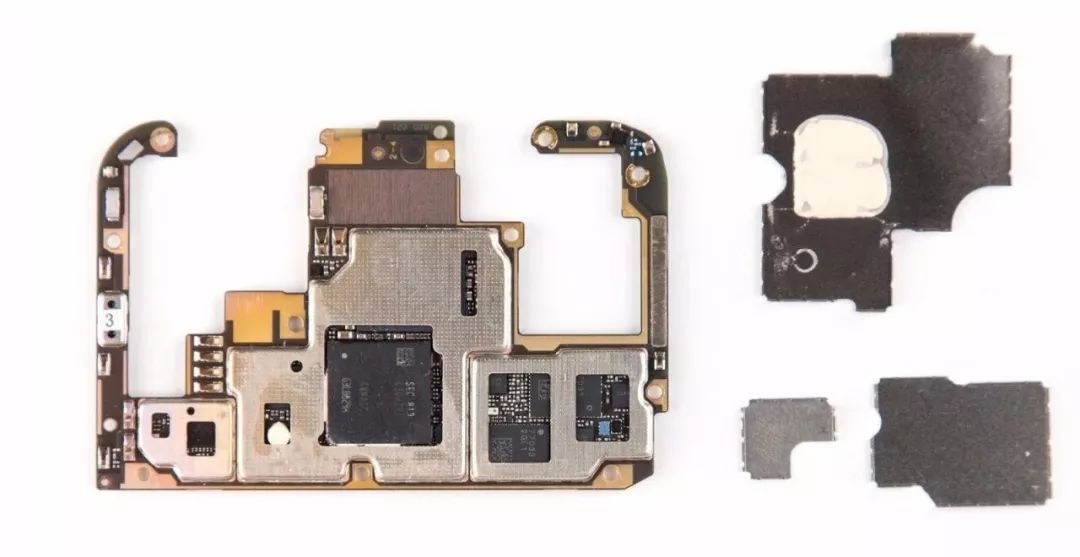
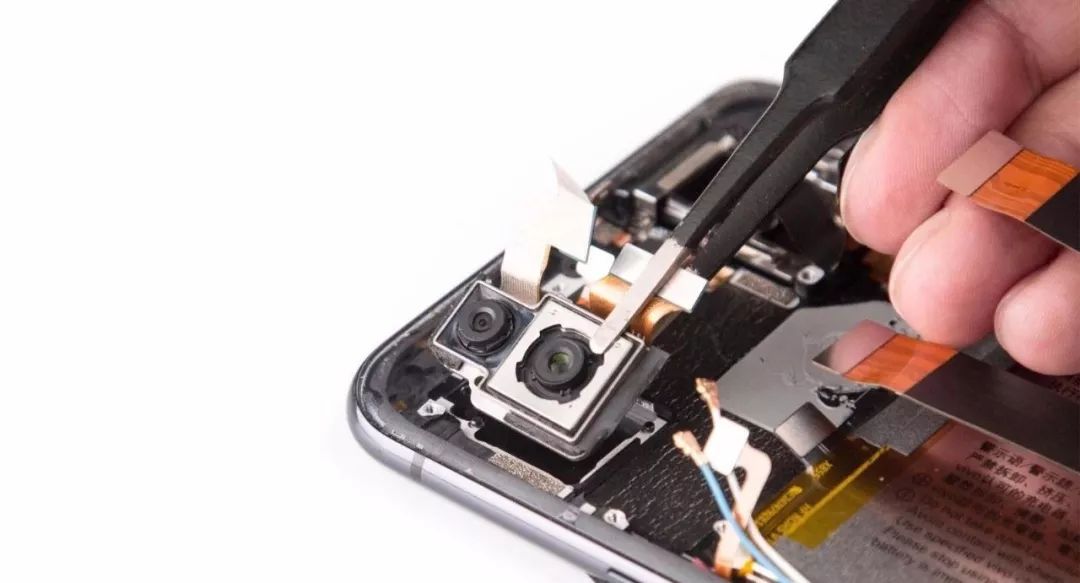
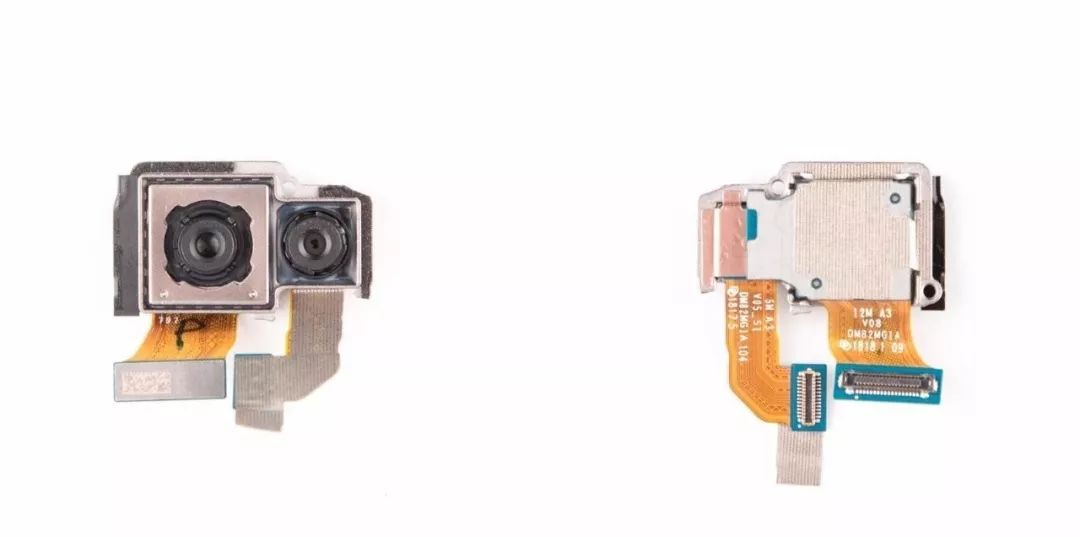
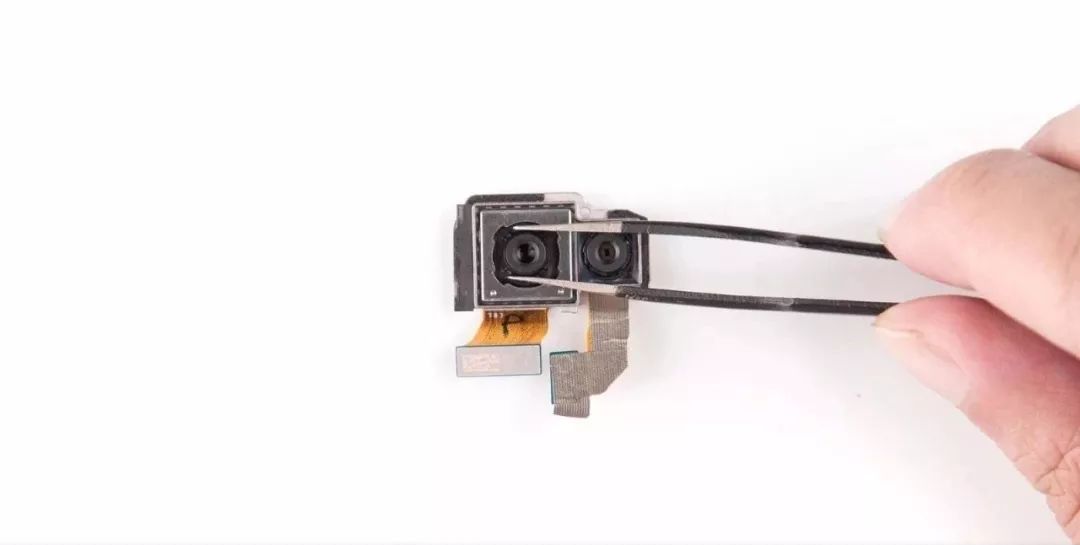
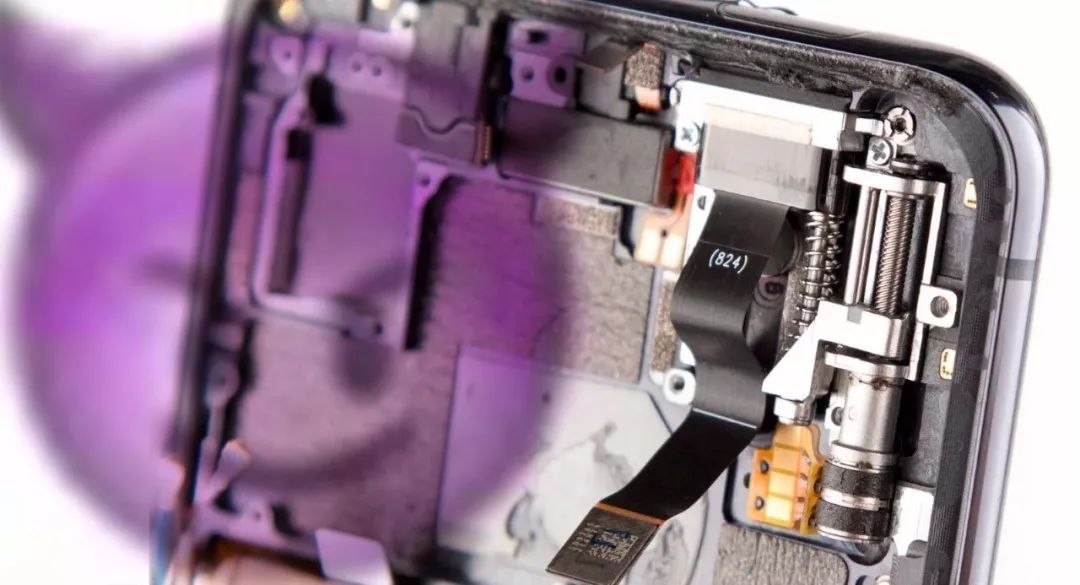
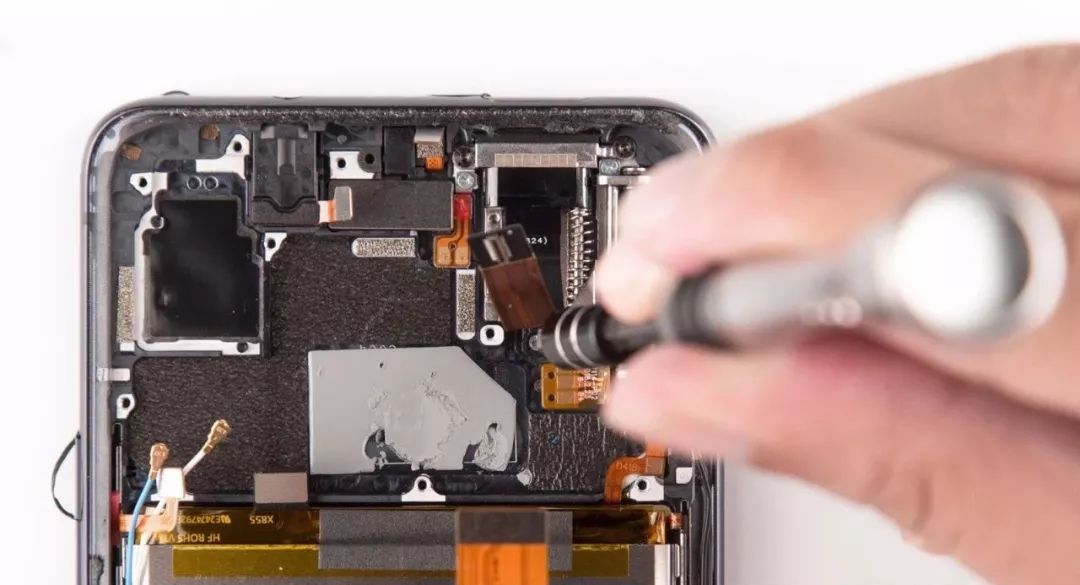
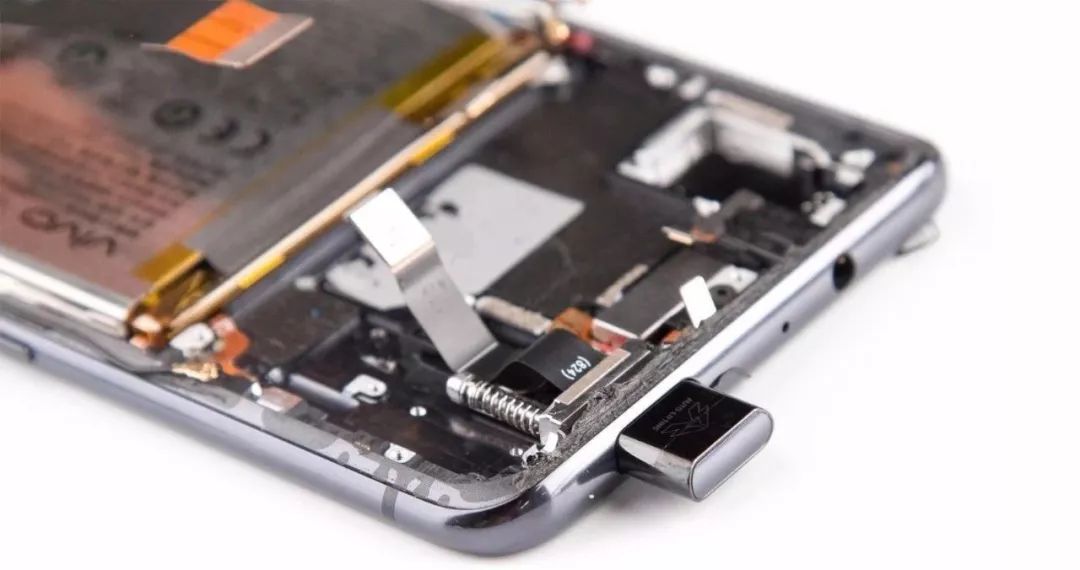
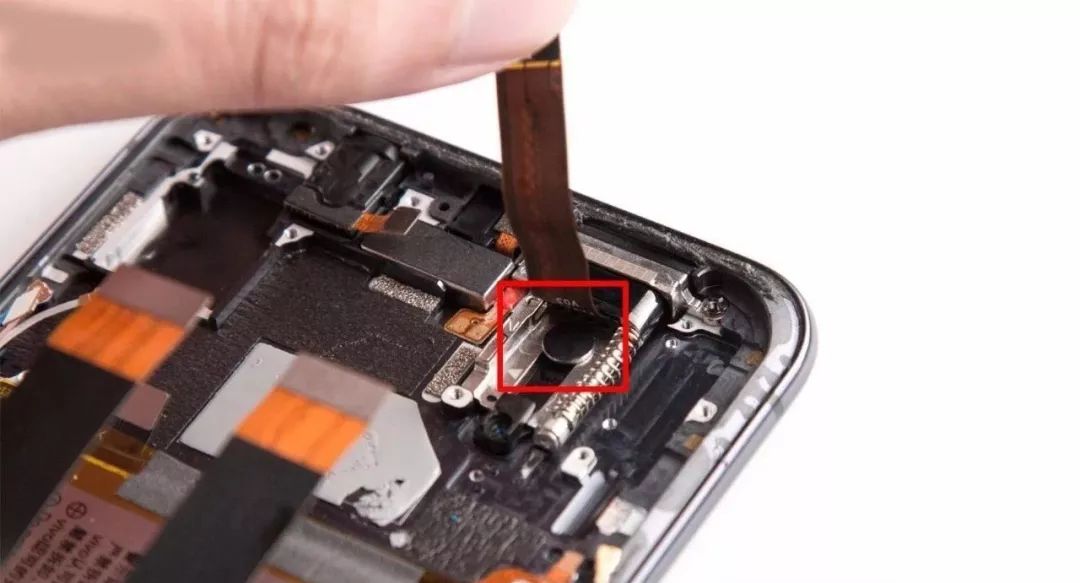
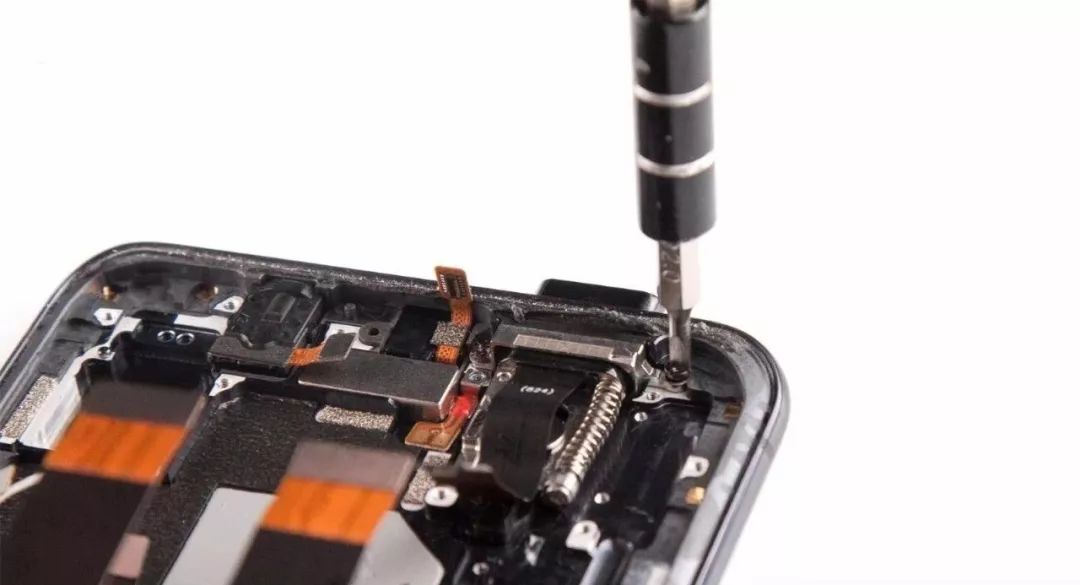
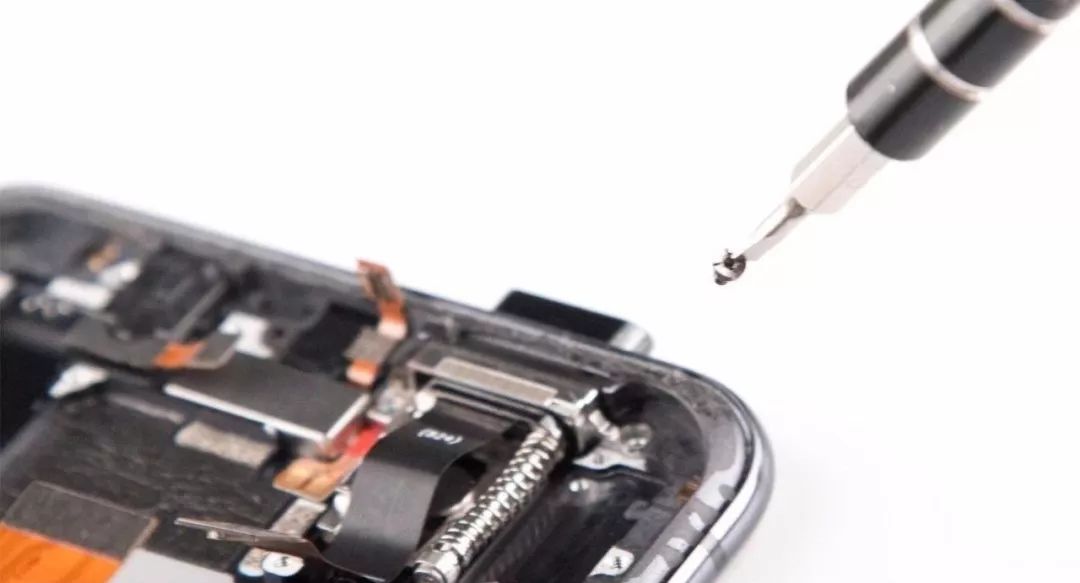
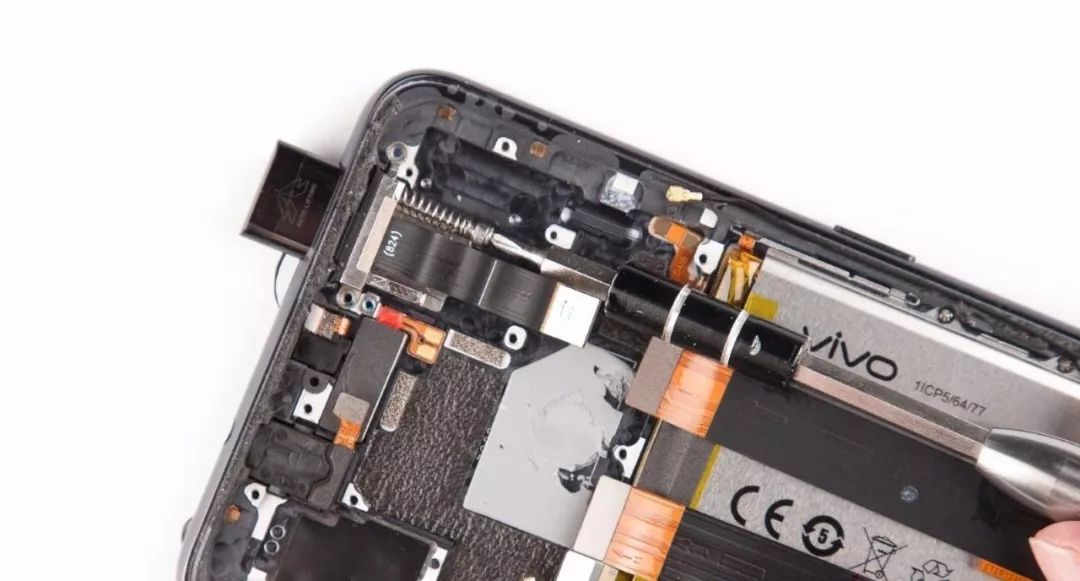
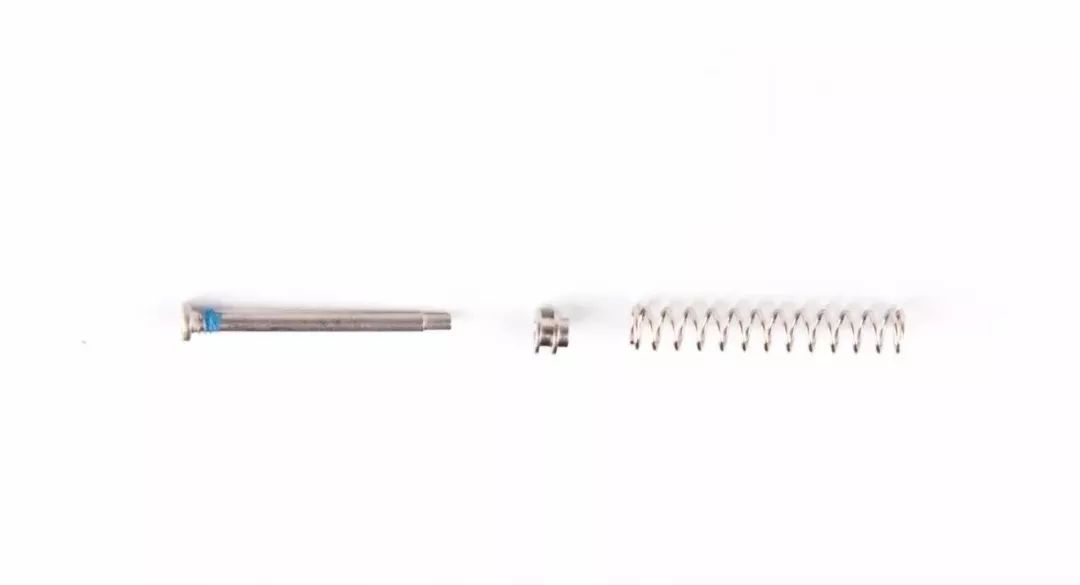
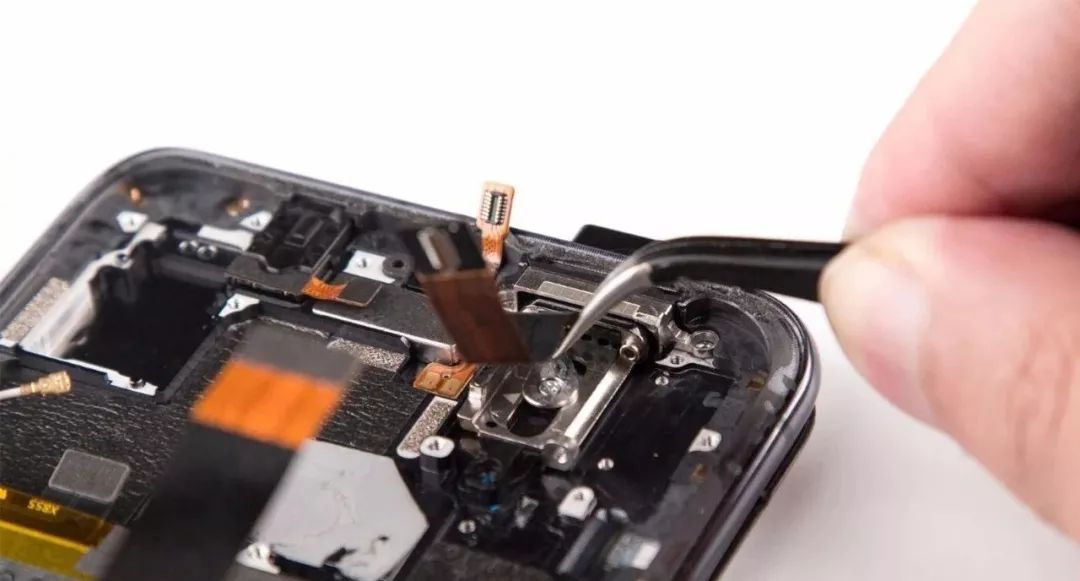
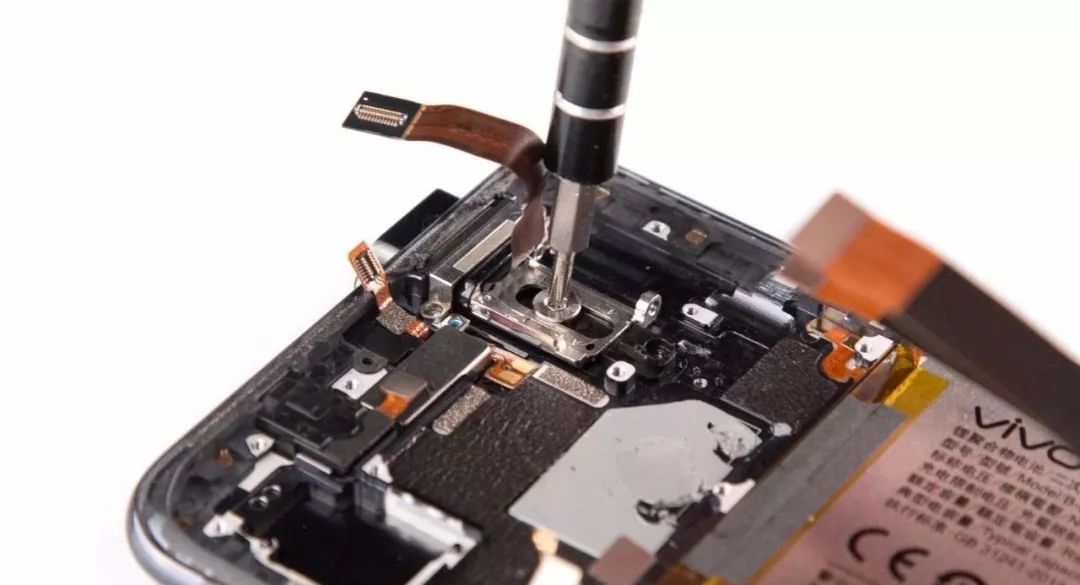
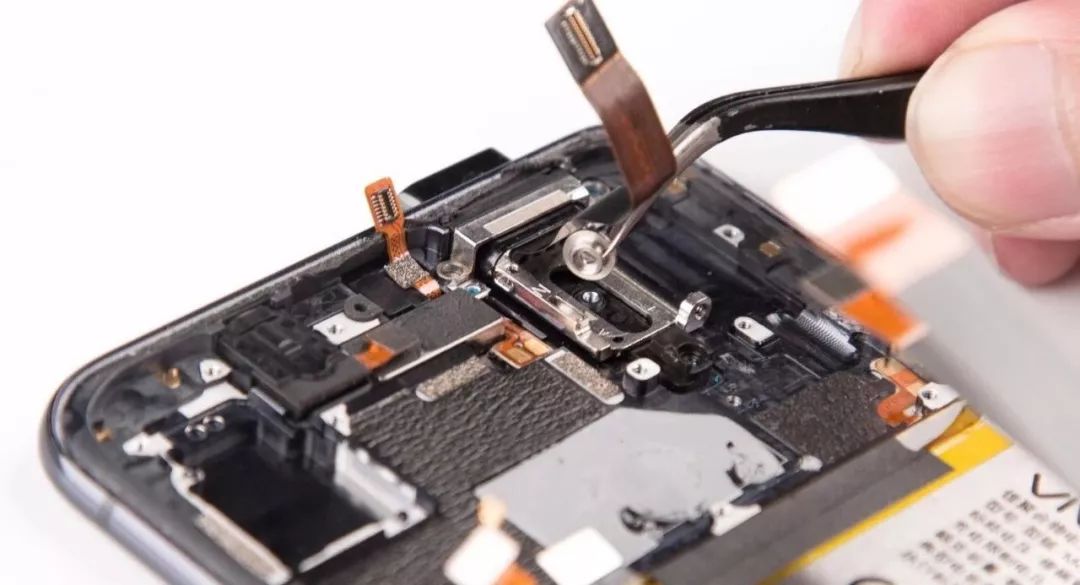
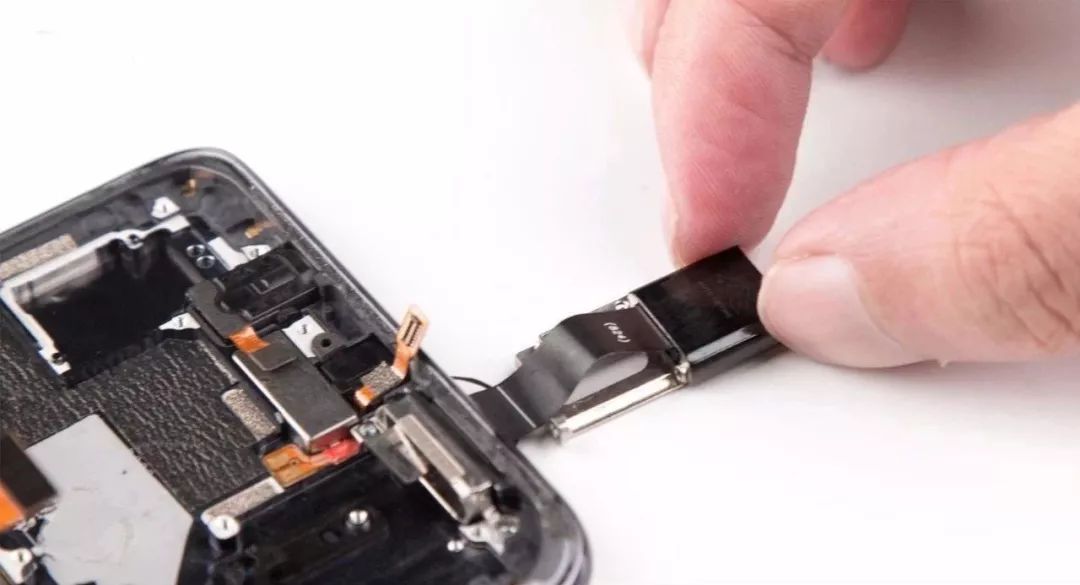
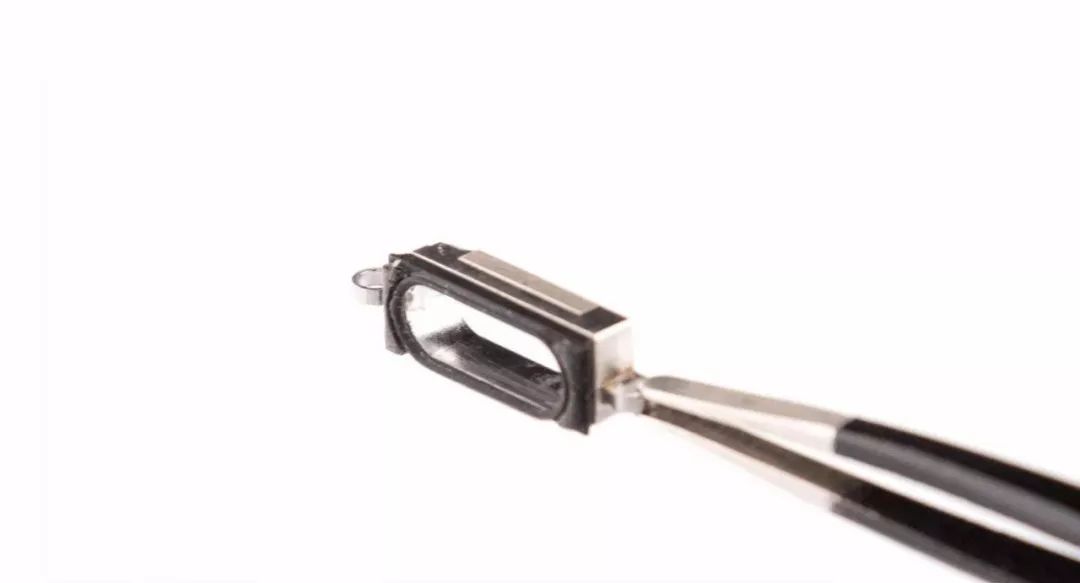
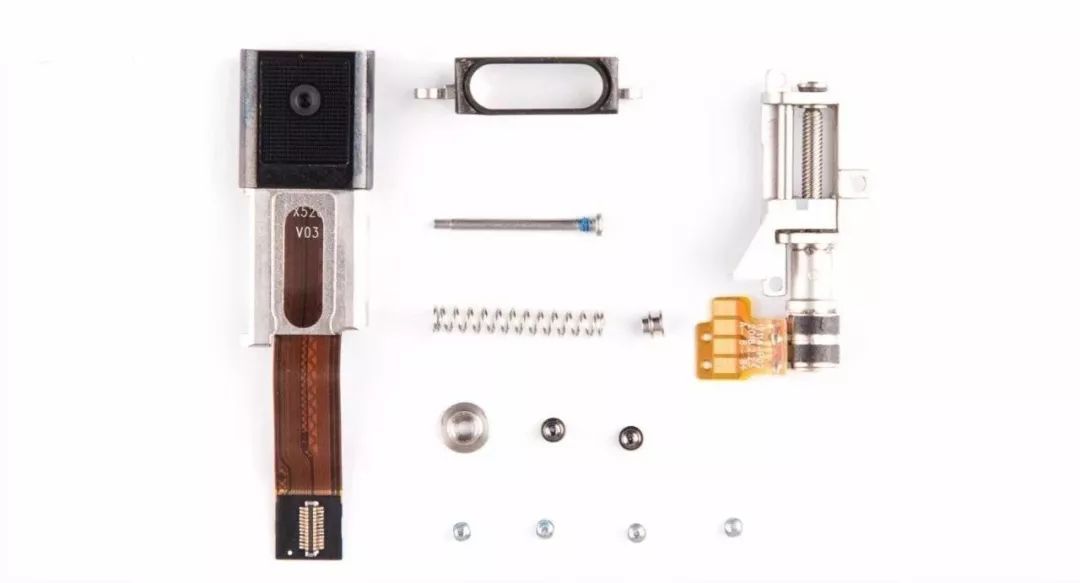
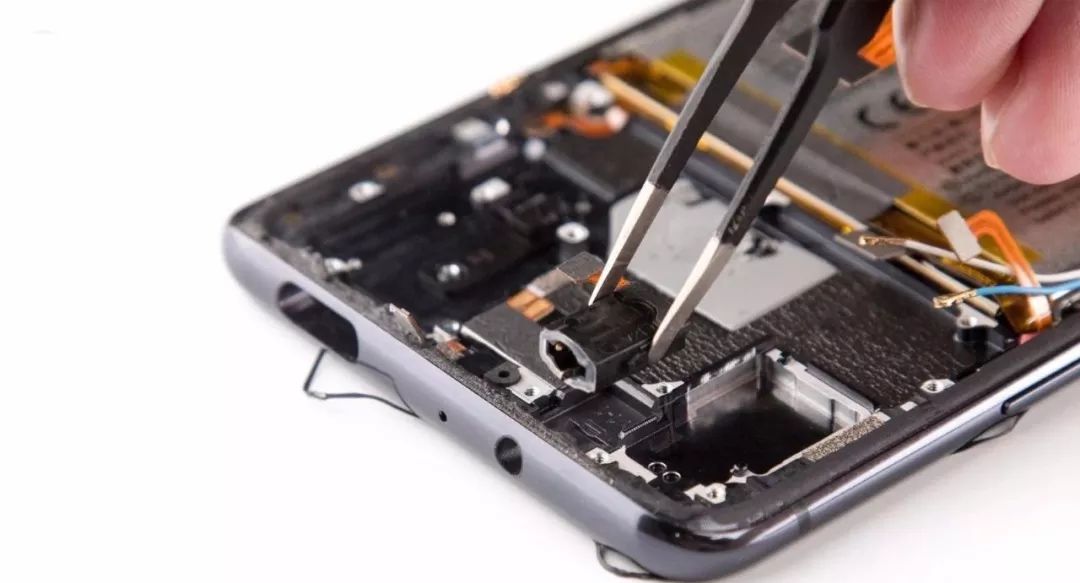
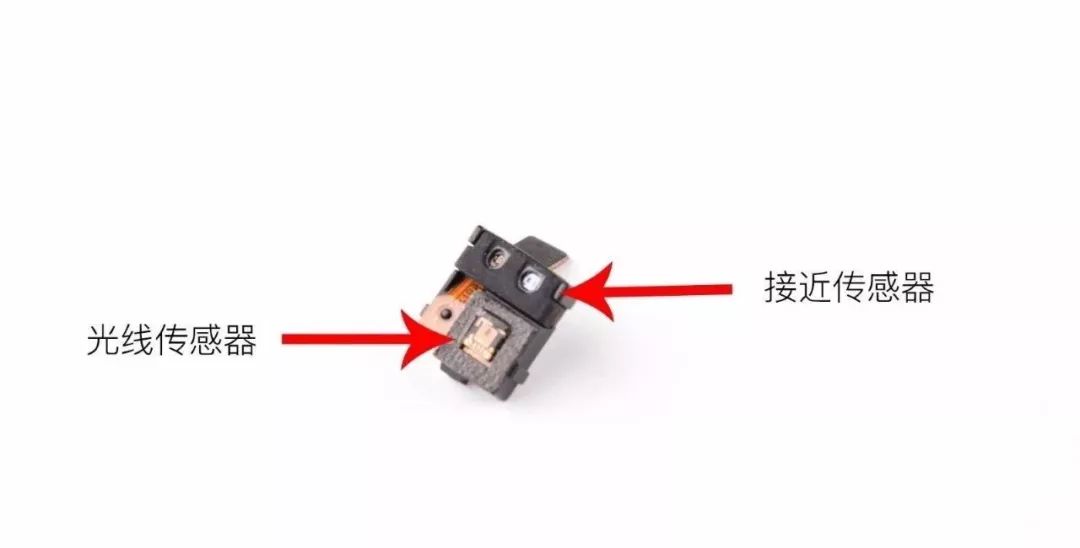
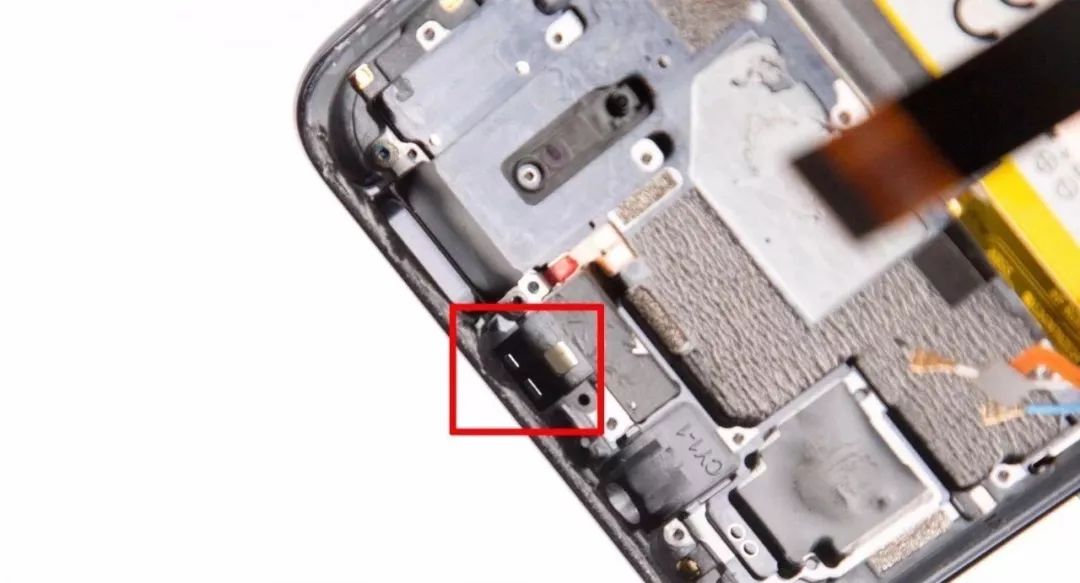
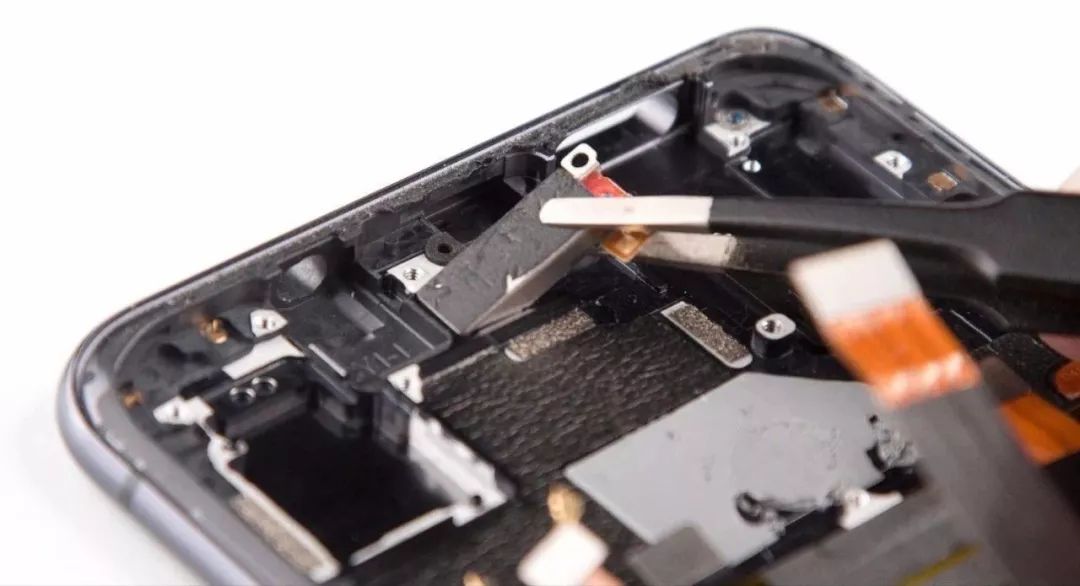
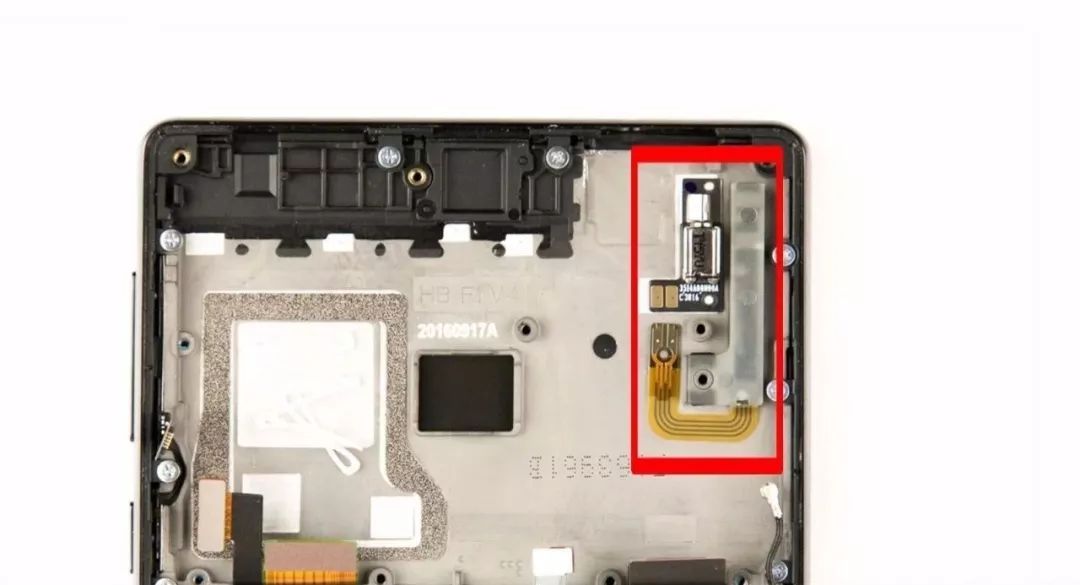
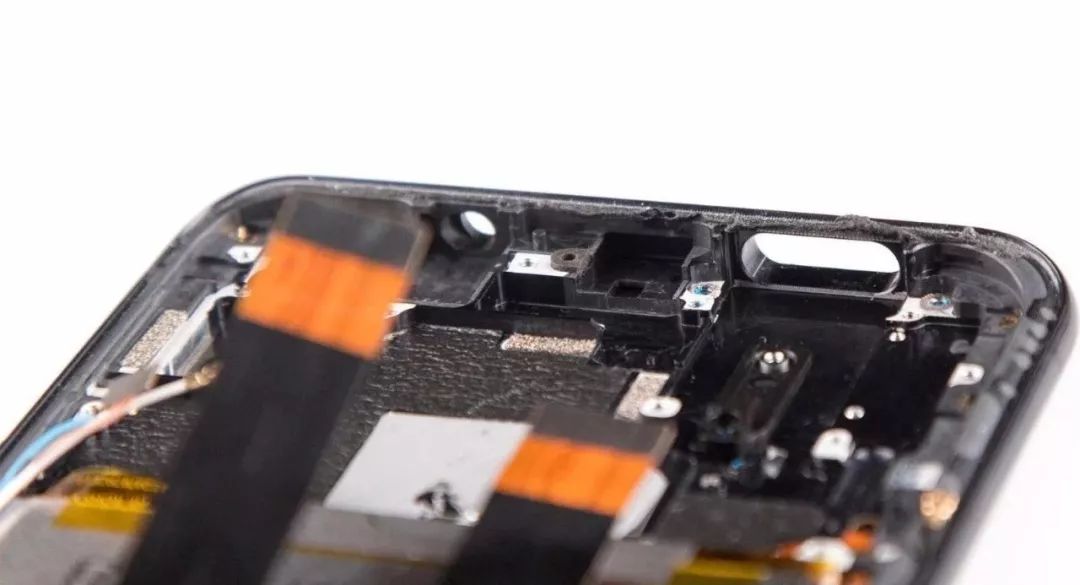
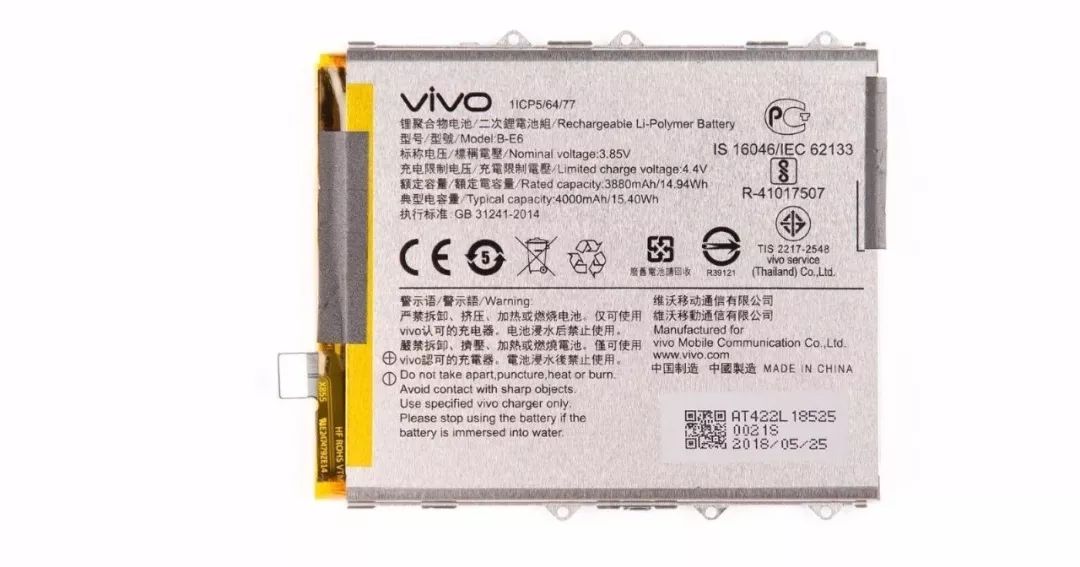
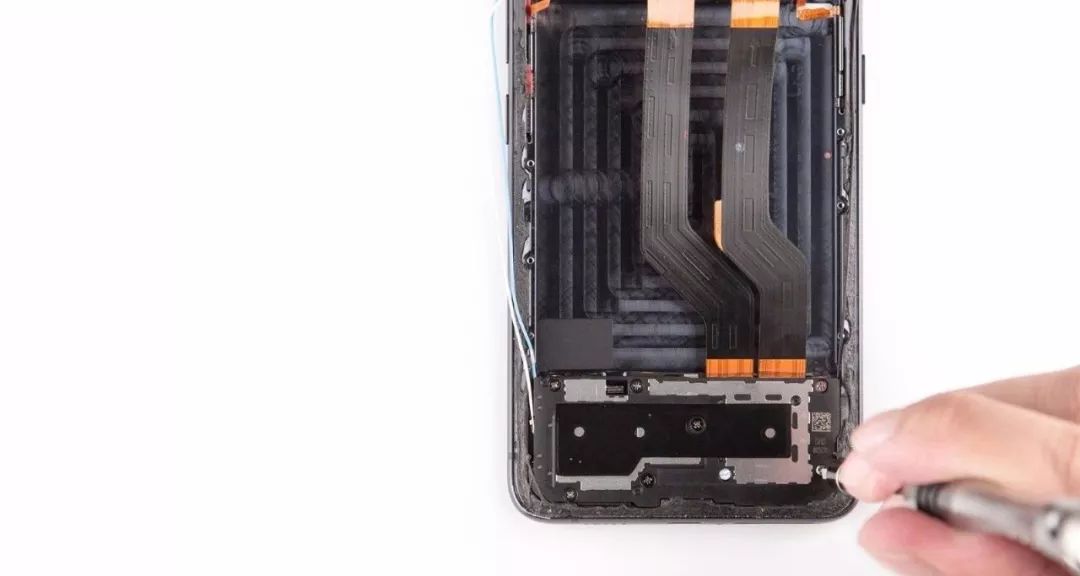
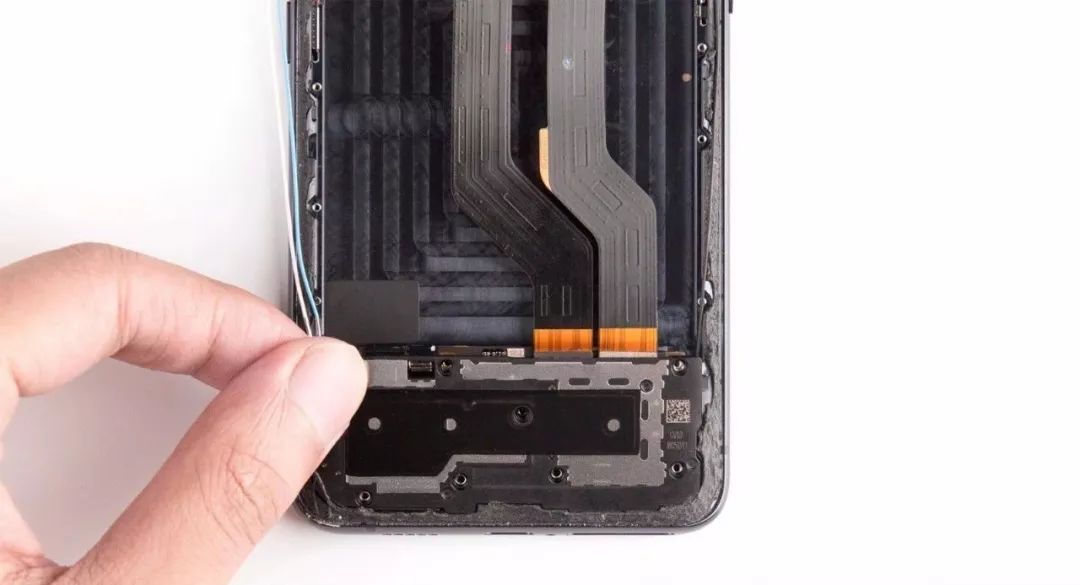
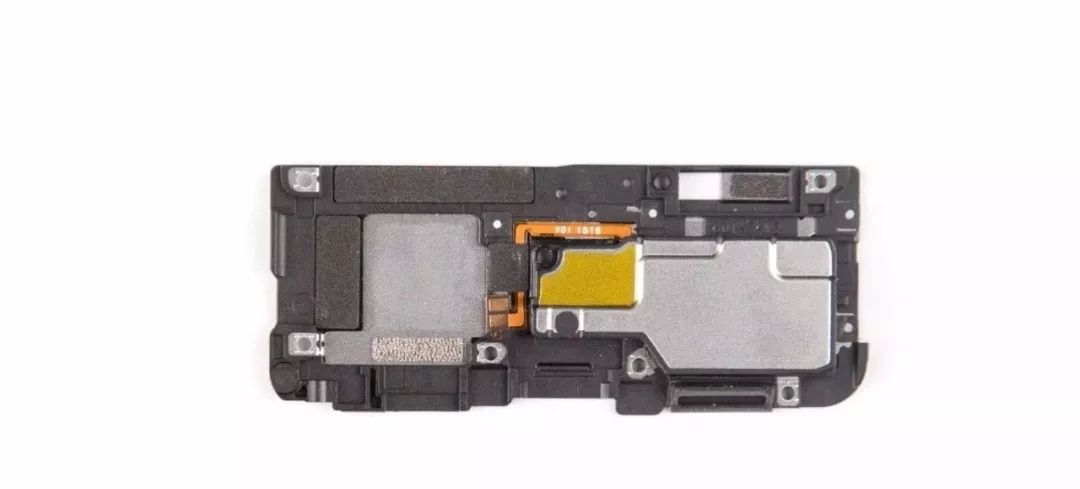
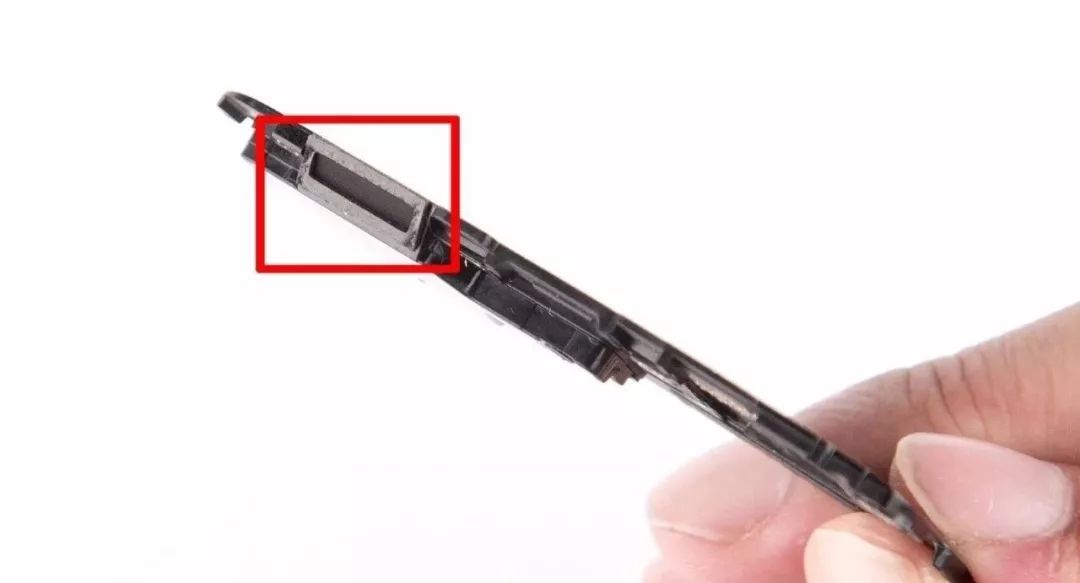
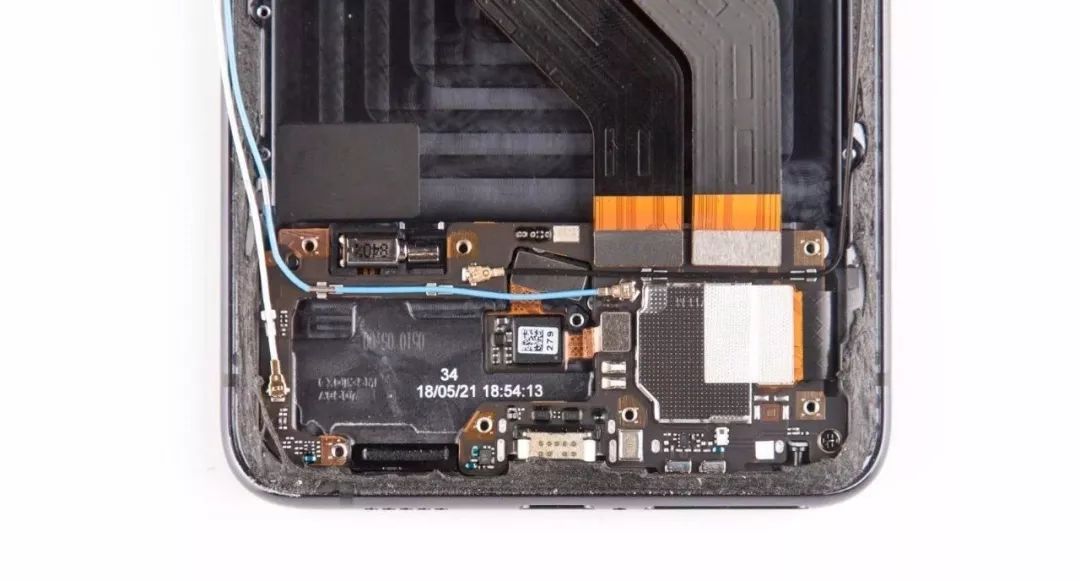
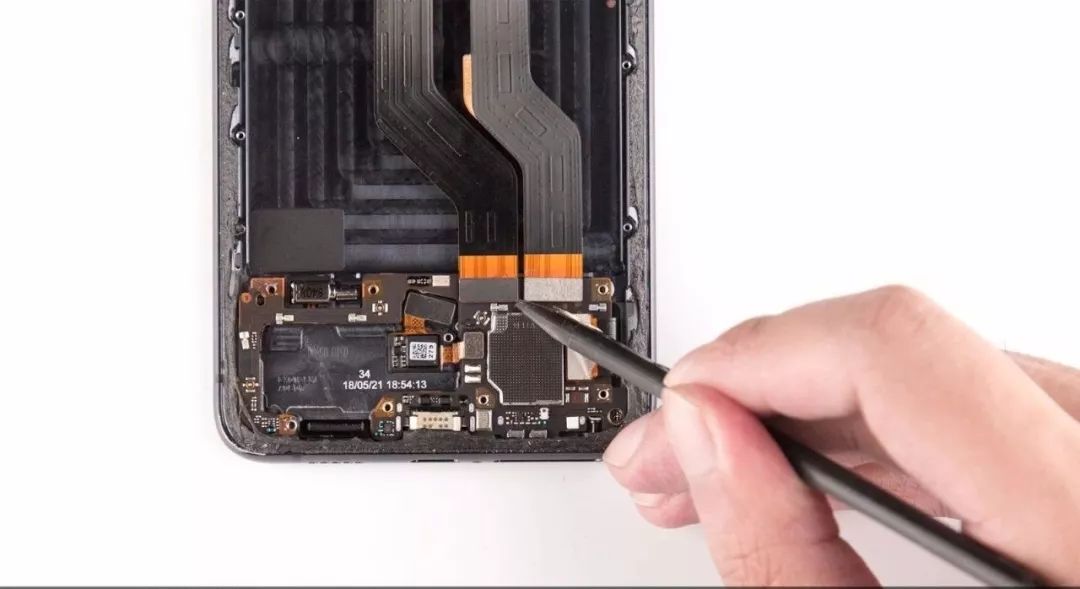
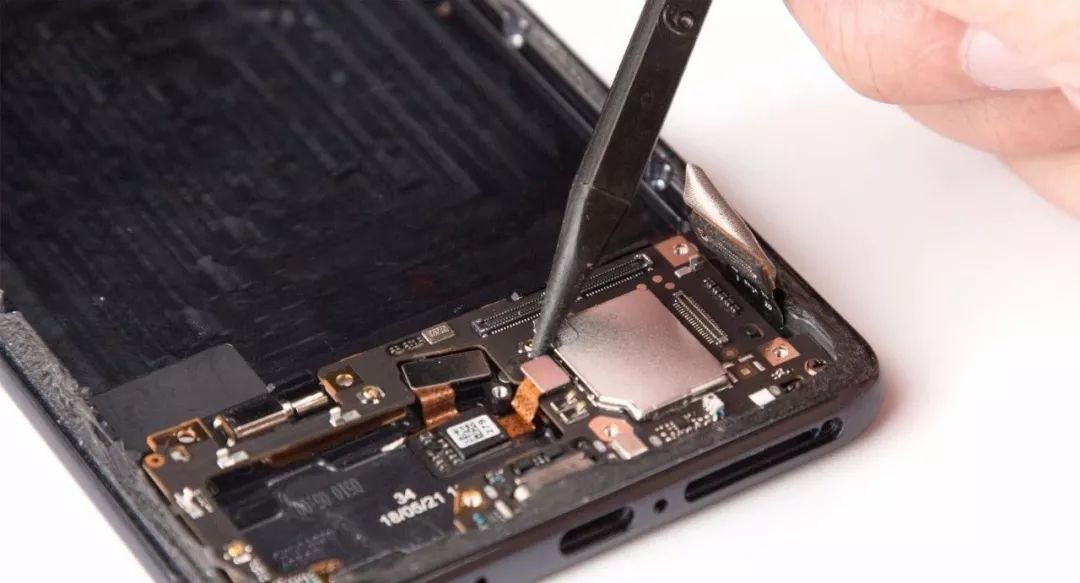
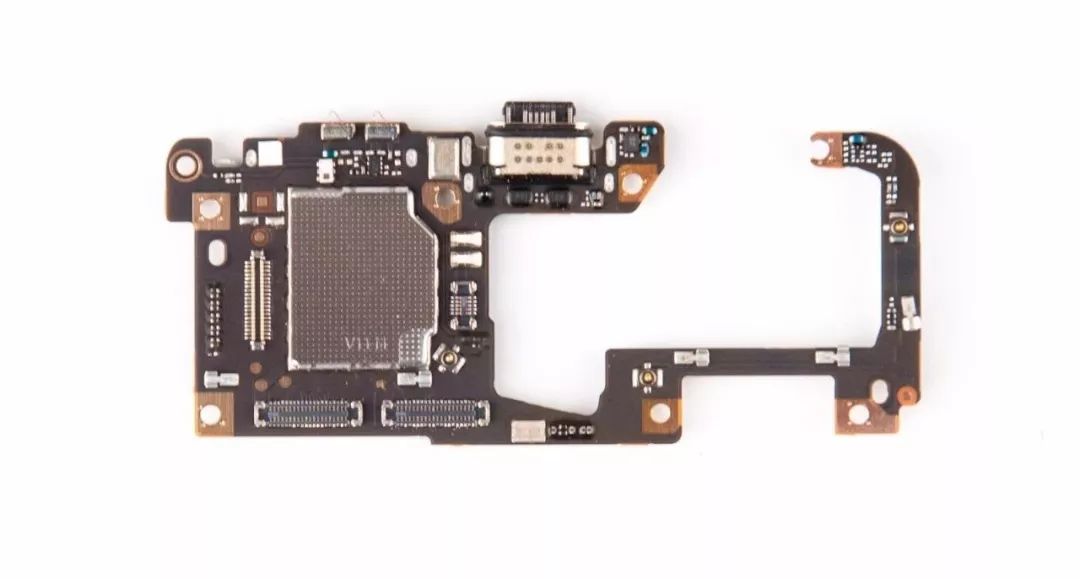
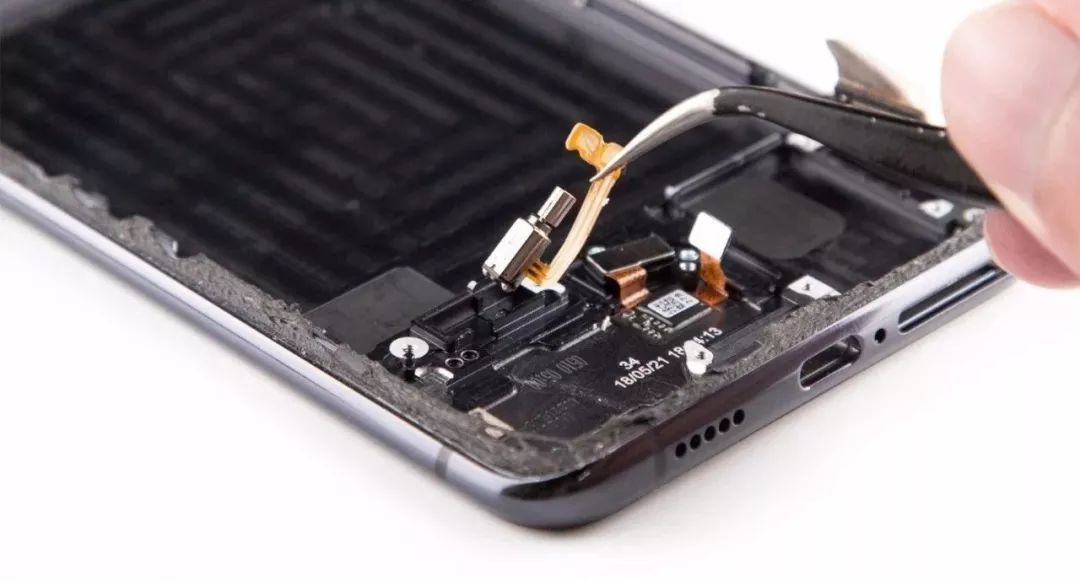
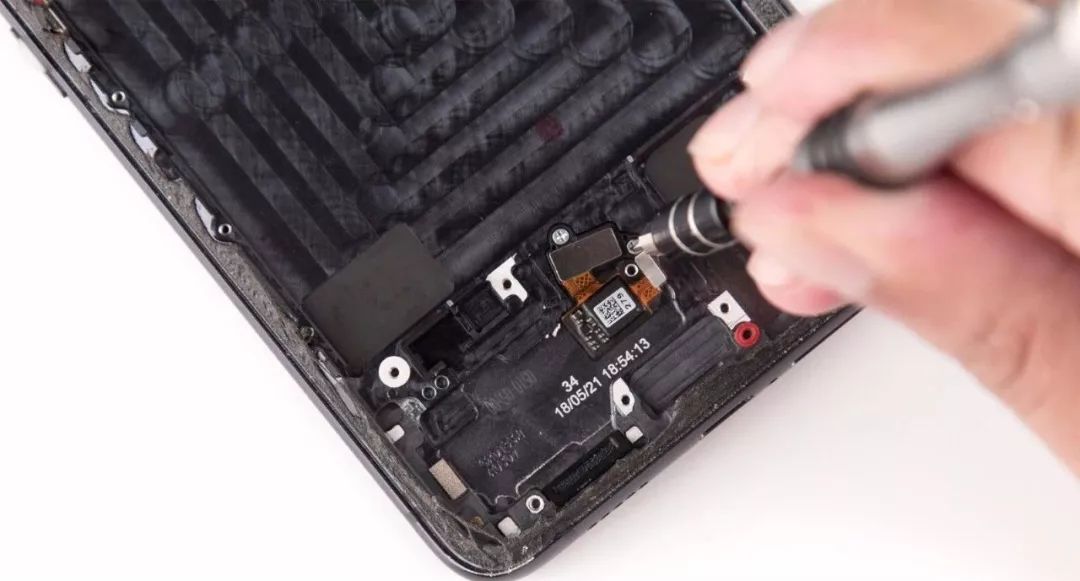
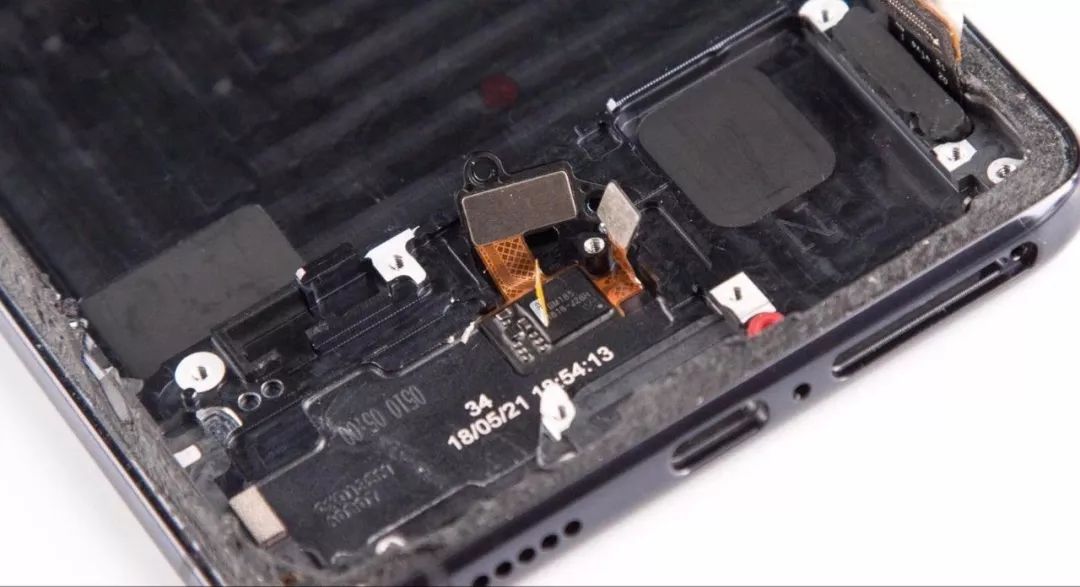
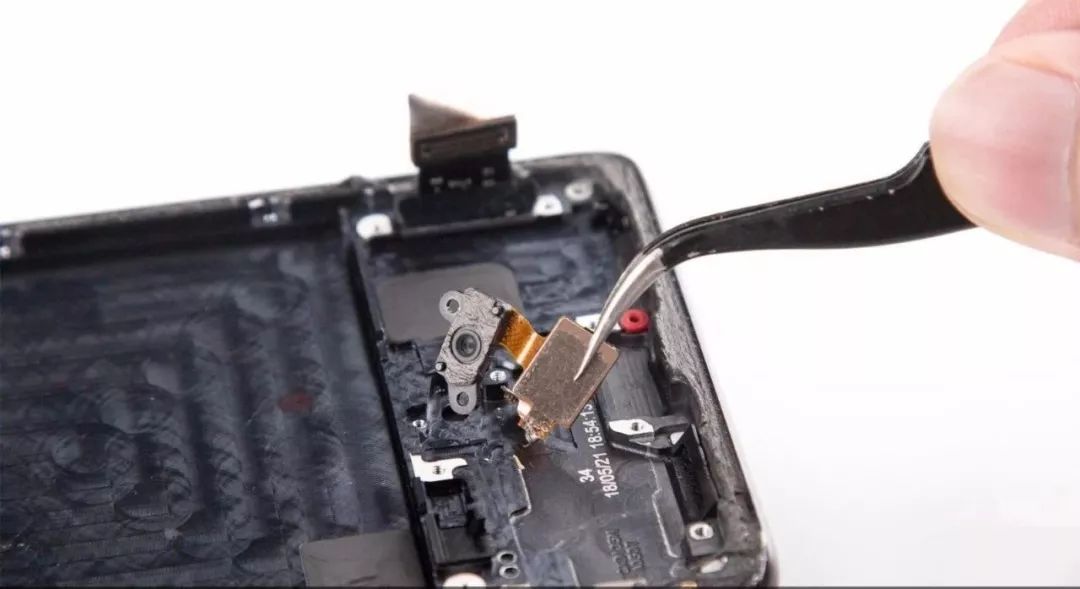
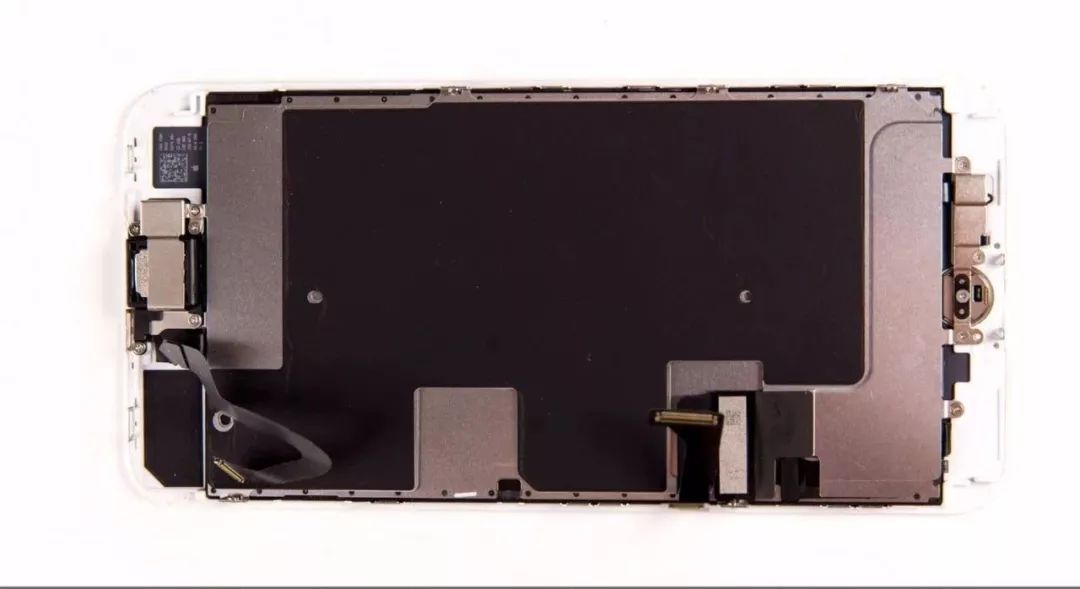
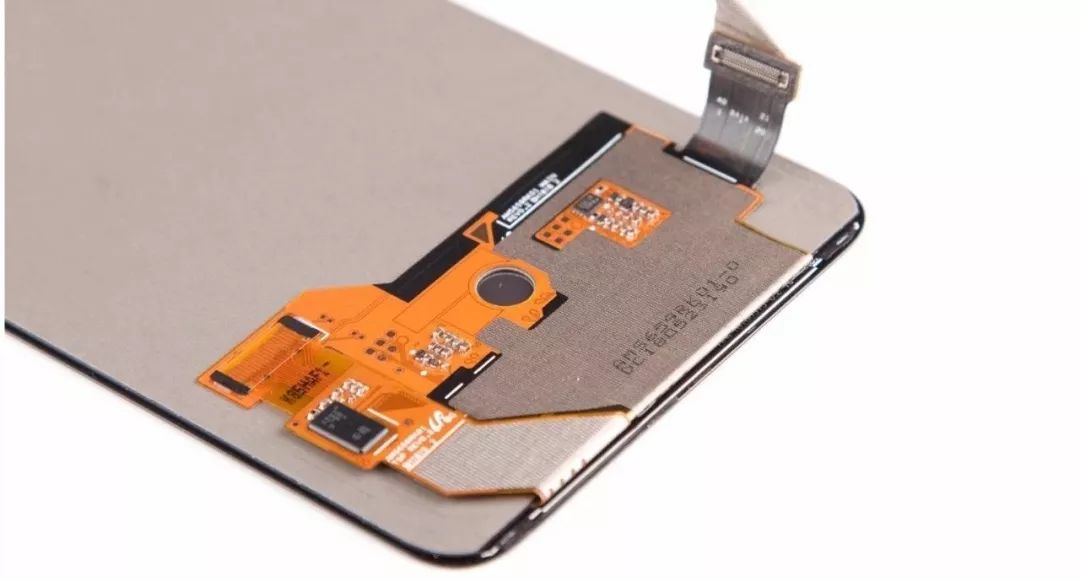
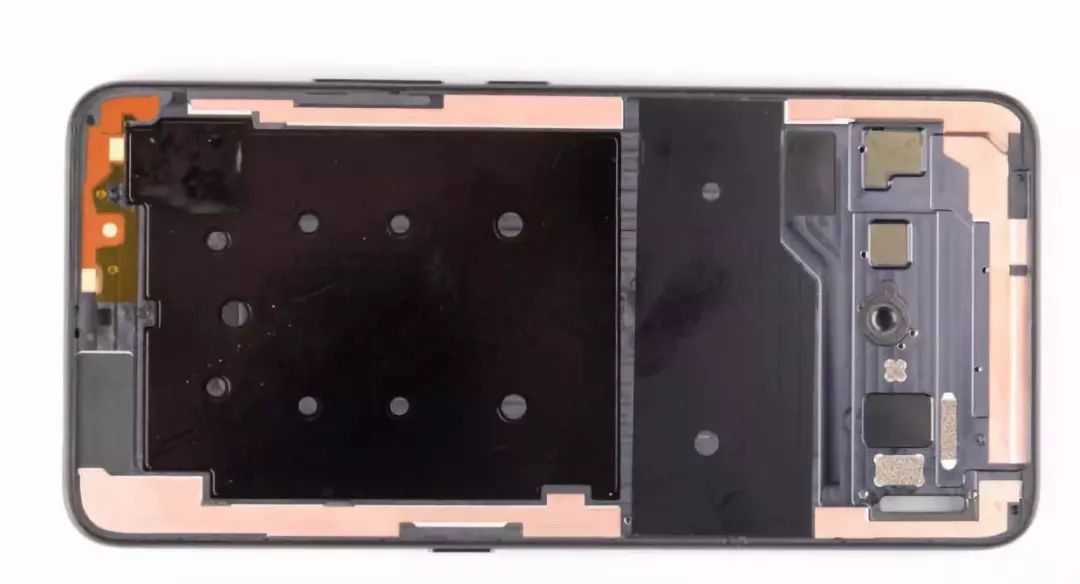
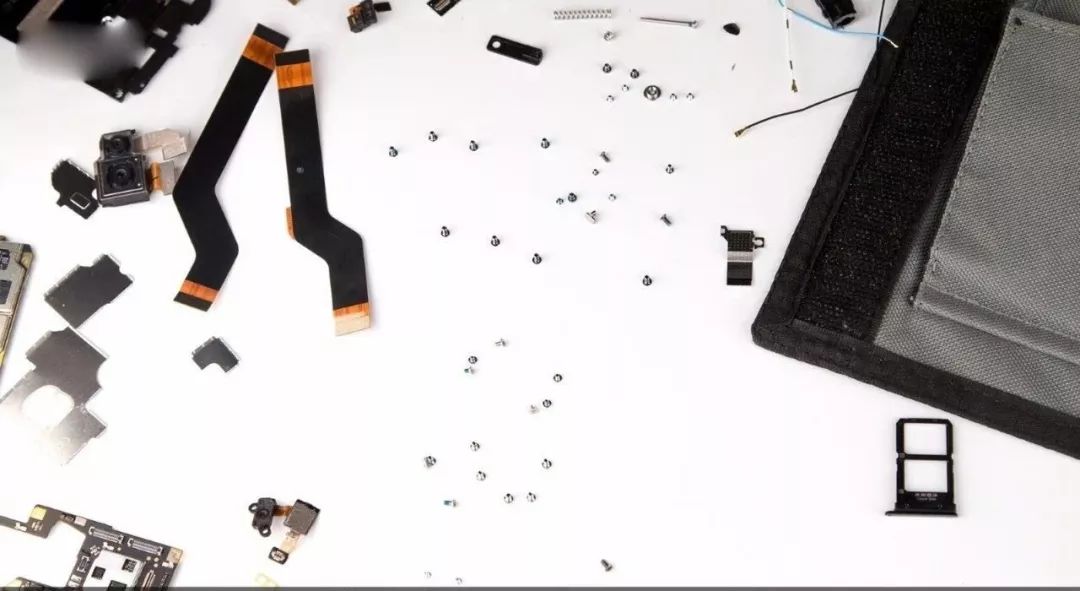
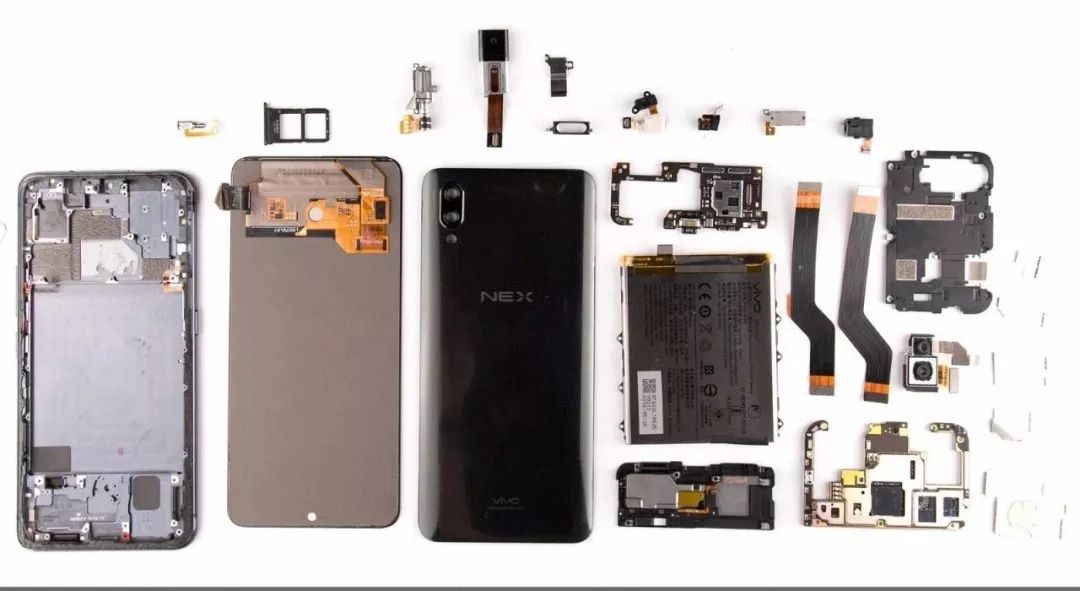
As a recently released full-screen flagship mobile phone, vivo NEX can be said to have gained enough attention. Whether it is the ultra-high screen-to-zero ratio full screen, the innovative lifting camera, or the full-screen sound technology, it is the first time it has been applied to smartphones. Recently, WeChat released the dismantling article of vivo NEX from the media "Broken Mobile Phone". Let's take a closer look. Vivo NEX is a mobile phone designed according to higher waterproof standards, and the back shell is made of 3D glass, so separating the back shell will undoubtedly become the most difficult and dangerous process. After separating the back shell, the three-segment structure inside the fuselage seems ordinary, but there are up to 39 screws that are rare in Android phones, and the types of screws have reached 4 kinds. Interestingly, we also saw the screw design of the mother and son on the first non-iPhone Android phone. Although the design complexity of the aircraft is not in the order of the iPhone, it is not bad in the Android camp. The NEX that I missed is finally here. Curious about how his proactively lifts and lowers? And what is the third-generation fingerprint under the screen, what is the earpiece on the screen? In order to find the answer, I want to disassemble this machine as detailed as possible, I haven't been so excited for a long time! Vivo NEX flagship is equipped with a 6.59-inch large bangs screen with a resolution of 2316 * 1080. And the machine also supports the third generation of off-screen fingerprint recognition technology, according to official statements, compared with the previous generation fingerprint image accuracy increased by 50%. The screen is made of OLED material with colorful colors, especially the bright and dark performance is more vivid than the traditional LCD screen, and has excellent power consumption performance. Because various sensors are hidden on the top, the top screen can be almost the same width as the border. There is nothing subtle, let us raise the front camera to feel this black technology! The front camera is not exposed, but is placed in a cabin in harmony with the color of the fuselage. The surface of the protective glass on the front has a green anti-reflection coating, and a lattice texture decoration is added below. If you look closely, you can also find that the corners of the lens are also rounded. The top of the camera uses an oval design. If you look closely, you will also find a circular mark. This is not difficult to guess. It is the infrared transceiver of the machine. Therefore, in fact, not only the camera but also other components are hidden in the lifting structure, and the degree of customization is very high. There is also a logo printed on the back of the camera, with AUTO LIFTING written under the logo. It is unclear whether this is the name of the supplier (not found on the Internet) or just the label of this camera function. The measured thickness of this pop-up front camera is only 4.45mm. This thickness is almost the thickness of an ordinary proactive, but he still has a shell package, so it is speculated that the internal camera unit should be specially customized. In terms of parameters, the camera has 800W pixels and F2.0 aperture. Due to the size limitation, it is not so eye-catching. But in terms of photographing experience, his performance is still remarkable. We will then disassemble this camera in depth to explore the internal structure! The back of the NEX flagship version is made of curved glass, the rear dual camera is designed in the upper left corner of the fuselage, and there is also a dual color temperature flash below the camera. Looking closely at the back shell, you will find that there is a very three-dimensional diamond pattern inside the surface glass. When the machine changes the angle, they will reflect the excessive gloss of different colors. Colorful black ". The camera has a certain protrusion, which protects the lens and surrounds a circle of metal rings, which has a certain decorative effect. In terms of parameters, the main camera has a 12-megapixel F2.4 aperture. I tried to show you the multicolored effect of the back shell at different angles, but this effect is not obvious under the strong light of the long light. The design of the side of the fuselage will directly determine the feel of the grip. Vivo uses edge curved glass and metal arc middle frame to achieve a very good grip. On the left side of the fuselage, the Jovi artificial intelligence button is added in the previous example, and the diagonal surface of the button is easy to handle. The surface of the middle frame is plated and has a high gloss, and the touch is very gentle. The top of the fuselage handles the proactive pop-up compartment, and a 3.5mm headphone jack is also designed to support the machine's powerful HIFI hardware. Noise reduction microphone is also designed at the top. Finally, vivo gave NEX its first USB-C interface. The SIM card slot is designed on the bottom of the fuselage. Note that the small hole used to eject the card slot is easily confused with the bottom pickup MIC hole, so what happens if you accidentally insert the MIC hole? We will find the answer for everyone in the dismantling later. The power and volume buttons are designed on the right side of the fuselage, and there is no slot for the position and the feel of pressing. The official parameter of the dimension is height: 162mm width: 77mm thickness: 7.98mm we measured the abdominal thickness 8.09mm. The maximum thickness of the camera projection is 8.61mm, so the camera projection is 0.52mm, which is relatively small, and it will not be too eye-catching. Remove the SIM card slot from the bottom of the fuselage. The SIM card slot uses a plastic surface layer with metal ribs inside, which not only guarantees strong toughness and rigidity, but also has a rubber seal ring on the neck to prevent water vapor from entering. It can be speculated that the machine is systematically waterproofed. There is no screw design at the bottom of the fuselage, so it is speculated that the back shell is an independent design, and disassembly is often started from here. We first use a suction cup tool to heat the under cover to soften the adhesive. Then try to use the suction cup tool to lift a gap in the bottom of the fuselage. However, even if it has been heated, the back shell is still immobile, it can be concluded that vivo uses a very strong and a lot of fixing glue. The back shell didn't move, but the screen on the front was sucked away ... We can only pray that our initial judgment of dismantling from the back shell was wrong. However, after opening the screen, I found that there were no screws inside. At this time, I was desperate because I couldn't use the suction cup. Although the screen was opened by mistake, it also gave us an unexpected opportunity to see the black technology under the screen. The first is the third-generation fingerprint under the screen. There is only a circular opening on the back of the screen, which makes us realize that compared to the X21 ’s The fingerprint on the screen has changed a lot. But after turning on the phone, I activated the fingerprint recognition window under the screen with my finger, and I found that the circular hole on the back emits a green light consistent with the screen. This is because the OLED screen is inherently transparent, so both front and back can see the light emitted by the screen. Just below the fingerprint recognition window, you can see a specially designed camera component. If a netizen who understands the fingerprint under the screen should have guessed his working principle, it is actually this ultra-short-focus camera that is collected through the screen. User fingerprint information. Unimaginable, the previous generation X21 is more like the traditional capacitive fingerprint recognition method, but it has to pass through a thick screen, so it is not difficult to understand why the fingerprint under this generation screen will be significantly improved. The surprise under the screen does not stop at the fingerprint. The opening in the middle of the cushion cotton at the top of the screen also arouses my curiosity. Be aware that this can be a display area, separated by a layer of screen. It can be concluded that the corresponding position is the light sensor under the screen. It is known that the OLED screen can transmit light, but the light will be weaker, so as long as the light sensor is larger, the sensitivity to light is increased, and the compensation algorithm is used to avoid it The interference of the screen light can realize the strength of the external light under the screen. Continue to dismantle, because the back shell and the suction cup can not be used, so you can only use the more violent alternative, first heat, and then use a knife to insert the gap between the back shell and the fuselage, and finally on the premise of not damage the appearance Next, successfully lifted the back shell. After lifting the back shell, using a thin plastic card to expand the gap a little bit, the back shell was finally completely detached from the fuselage. I feel that the fixed strength of the back shell is comparable to that of Samsung S series mobile phones. Lifting the back shell, NEX's interior will be shown to everyone for the first time. To be honest, I was a little excited, because I finally saw the internal structure of the pop-up camera. It can be seen that the three-stage design structure is used internally. Because the SIM card slot is designed at the bottom, the entire bottom module occupies a large space. The top motherboard is fixed by a large area cover. The proactive structure is not yet visible. Let's take a look at the back shell first. Because the under-screen fingerprint is used, the back can be free of any electronic components. A large area of ​​heat dissipation posts are covered at the corresponding positions on the motherboard. The thickness of the back shell can be seen from the local thickness of the glue strength. The thickness of the back shell of the machine is measured to be 0.79mm. Next, the plastic cover above the motherboard. First, the screws on the surface need to be removed. Subsequently, the cover plate is separated. There are no electronic components on the back of the cover. To be honest, I thought that the lifting camera would take up more internal space, but I did n’t expect him to take up so much space that the motherboard was sandwiched by a small part of the space between the front and rear cameras, but the side of the motherboard was also seen from the side. Component integration is very high. Although the lifting camera is very eye-catching, it is also very mechanically beautiful. But I still decided to remove the motherboard first, and then study her carefully, so first disconnect the battery cable, and then disconnect the nearby buttons, the bottom sub-board and other cables in turn. Disconnect the coaxial cable here. There are two coaxial cables on the left side of the motherboard. As a result, the machine has three coaxial cables connected to the bottom. It seems that most of the antennas are integrated below. What surprised me was that the cover fixing the proactive link was actually fixed with a screw. This kind of screw is very rare on mobile phones. In the past, I have only seen a threaded hole on the top of the iPhone, so another screw can be screwed on it. It can be removed with a flat-blade screwdriver. The fixed cover of the proactive connector can then be removed. At this point, you can disconnect the proactive connector. But at this time the proactive module can not be separated from the fuselage. So we temporarily remove the motherboard first. First disconnect the two connectors of the main camera. The design of the machine is highly modular. So you can see that the headphone jack is also designed independently, disconnecting it from the connector on the motherboard. Here is the link of the light distance sensor module, disconnected. At this point, the motherboard has been loosened and we can easily remove it from the fuselage. It can be seen that in order to make room for the front and rear camera modules, there are two huge defects on the motherboard. In fact, the size of the motherboard is not large. Because of the high degree of component assembly and full space utilization, another reason is that the SIM card slot is designed at the bottom. The large shield on the front of the motherboard is covered with a layer of heat dissipating copper and platinum. After opening it, you can see several small components exposed, but this mask is not removable. The two shields are almost close together, which is a great test for the welding process, reflecting the high integration of this motherboard from the side. Officially, this makes the machine achieve a 4000mAh large-capacity battery. There are three 3 shields on the back of the motherboard, which are also closely connected. The larger shield in the middle is covered with a layer of heat-dissipating silicone grease. Separate the surface cover, the most obvious position in the middle is the Samsung K3UH7H7 8GB LPDDR4 memory chip, and the Snapdragon 845 processing platform is stacked underneath. The corresponding position of the cover body also has heat dissipating silicone grease. The memory is hidden in the shield next to it and cannot be viewed. Without the cover of the motherboard, the rear main camera can also be easily separated from the body. It is worth noting that the following main camera module incorporates a four-axis optical image stabilization component, which can avoid the reduction of the film formation rate caused by hand shake. Some people may complain about how the parameters of the secondary camera are so shabby. I speculate that it may be because the volume of the four-axis anti-shake is too large, so the vivo product manager can only choose between better anti-shake and better sub-camera. Finally chose the former, can you accept it? From another perspective, it can also be seen that the electric board of the main camera has "occupied" a large area of ​​the bottom of the sub camera. We know that the two dual cameras with ordinary parameters may not perform better than the single powerful single camera, because the two meet different needs. Looking back and forth in this picture, and the next picture, you can know how to identify optical image stabilization. It can be found that the lens module has a large amount of shaking, which is the working interval of the anti-shake component. If it is only the haul of the focusing module, there is almost no horizontal shaking. Next, we can face him with an evil smile, first let us look at the process of its work. The spring design is a buffer mechanism designed to prevent the external force from pressing the camera. It is the spiral stepper motor on the right that really completes the whole maneuver. Let's take a look at the removal of the fixing screws of this module. After removing a few screws, the stepper motor is loose, we can separate it, we can see that the position of the tweezers clamp is connected to the camera, and the stepper electromechanical formally controls the movement of the camera to drive the movement of the camera. Close-up of the front and back of the stepper. Customizing this component alone, the cost is not what ordinary manufacturers can achieve. It can be seen that vivo already has enough power to speak in the upstream of the industry and has a strong industrial chain control ability. At this time, the front camera has no motor brake and can slide up and down at will, but the limited position mechanism still limits its sliding interval. And this limit mechanism is located between the frame of the proactive module, which is a disc limit pile. It took me a lot of time to get rid of it. Let's take a look at this spring again. It is a buffer mechanism between the transmission mechanism and the front camera module. It can ensure that even if the camera is bumped accidentally, it can still have a buffer without damaging the transmission mechanism. Now you can press it with confidence. If the limit pile is only used to fix the camera to slide back and forth, then the metal frame near the border is to prevent the camera from shaking left and right, and plays a sealing role. At the two ends of him are also fixed with two screws. Mother screw close-up. Need to use a small flat screwdriver to remove. As the largest opening of the whole machine. The tightness here is my concern. From the top, this proactive tolerance control is small enough. At this time, I have been thinking about how to separate proactive from the fuselage. See the screws on the side of the module. Without saying anything, let it go. From this, we found the most special screw of this fuselage type. As it is removed, the spring and gear coupling ring can also be removed. Close-up of the bottom bracket screw, spring and gear coupling ring. Looking at all the screws of the pro-camera module has been removed, but still can not be separated, disassembly into a deadlock. Knowing that the surface of the limit cylinder is actually covered with a black sticker. This kind of design is to make you think of Apple. Remove the screws here. Finally, we separated the limit cylinder. Subsequently, the proactive module was also successfully separated from the fuselage. After getting rid of the front camera, the limit metal frame has also been successfully separated from the fuselage, and you can see the black seal rubber ring design on the top. Seeing that there are also strict seals here, give Vivo a compliment. Close-up of metal limit frame. At this time, we get a family breakdown of the proactive parts decomposition of vivoNEX. But unfortunately, because we only have this machine, and we will use it in the future, it is impossible to disassemble the proactive package to see the internal structure. Next, separate the headphone jack. At the top of the headphone jack, you can see the liquid silicone injection molded sealing ring. This design is the same as the sealing method of Samsung S9. The body of the headphone jack is also a completely sealed structure. The cost of this design will be higher, but it is necessary for waterproofing. At the top of the earpiece is the light distance sensor module, yes, they are actually designed in one piece. It can be seen that the upper part of this module is the transceiver element of the distance sensor, and the lower part is the enlarged light sensor. The larger volume is easier to accept the light transmitted through the screen. I have seen this design on Apple Watch before. . Module close-up. The proximity sensor is at the apex of the frame, which is the most extreme uppermost, and the light sensor also specifically opens a sensing window behind the screen. Look at the light sensor's sensor opening from the screen position. Next, this component, which is much like a linear vibrator, is the handset of the phone, the key of the screen sound technology claimed by vivo. From this, it is indeed a huge difference from the piezoelectric ceramics of Xiaomi MIX generation. However, the principle of sound generation is to drive nearby components to vibrate. From the perspective of packaging structure, the cost of this vibration unit is not low. It realizes that even if the body does not have an opening in the earpiece, it can be heard close to the screen to hear a very clear sound. Compared with piezoelectric ceramic sound, this design can bring Come for a better sense of hearing. Let's revisit the structure of Xiaomi's cantilever beam piezoelectric ceramic vibration sound module. At this point, the components on the top of the fuselage have been disassembled. It can be seen that the corners have undergone nano injection molding and metal thickening, and the anti-drop design is very obvious. In order to ensure the reasonable placement of components, the surface of the roll cage has undergone a complex injection molding and CNC cutting process. Vivo NEX's battery fixing method is also significantly different from the past. The battery is fixed on the metal base, and the base is fixed by six screws on both sides. So we first need to remove the fixing screws. After removing the screws, the battery module can be easily separated. It is very simple and has no fixing glue. When I first saw the battery package, I thought the supplier bank was Sony, because I saw a similar package on the disassembly of the Sony X72. The battery capacity of the machine reaches 4000mAh, 15.40Wh battery capacity, supports 22.5W dual engine flash charge. From the back of the battery, it can be seen that the battery supplier is ATL Next, separate the bottom module of the battery, first remove the 8 fixing screws. Then detach the bottom speaker module. The sound quality of the speaker of this machine is very high, and the actual listening sense is remarkable whether it is resolution or low frequency performance. But some regret is that it is impossible to achieve stereo speaker. Close-up of the back of the earpiece, the supplier is unknown. A ring of sealing foam is attached to the sound hole, and there is a fine sealing net inside. Below the speaker, you can see the highly integrated sub-board design, with a total of 7 cables connected to it. Because the space is really precious, the vibrator had to use the traditional rotor vibrator and was placed in a very narrow space. Next, disconnect the coaxial cable connected to the sub board. This connector is the cable of the fingerprint module under the screen. This connector is the cable of the fingerprint module under the screen. After disconnecting the cable, we can separate the bottom sub-board. A chip on the front of the sub board is protected by the shielding cover. The microphone and data interface are also integrated with this. A chip on the front of the sub board is protected by the shielding cover. The microphone and data interface are also integrated with this. In addition, the data interface is also sealed, with a rubber seal on the front and a little rubber seal on the back. Separate rotor vibrator Remove the two screws securing the fingerprint module under the screen. It can be found that the front is a specially designed ultra-short-focus coms module. There is also a processing chip behind the module, code-named GM185, which makes it impossible to determine which supplier it is. However, it was previously reported that Huiding and Synopsys are both suppliers of fingerprint recognition for this machine. Close-up of the fingerprint recognition module under the entire third-generation screen. At this time, the back of the fuselage is bare, but the front screen has not been separated. There is a rubber plug to fix the screen cable. Separate it. At this time, the screen cable can be taken out from the rear side of the fuselage, and finally separate the screen. Close-up of screen module. I do n’t know what it feels like when the screen squeezes around the cover glass with only one slit left. Anyway, I am very excited. Because I saw tremendous progress in technology. For comparison, we might as well take a look at the screen module design of ipone8plus, I feel that it is not a product of an era. Even at the bottom of the screen, vivo NEX has been squeezed to the same narrowness as the bezel, but because there is always room for the screen leads to bend, the bottom black edge will still be thicker than the other edges. But it is already very narrow! The roll cage of the fuselage is made of aluminum alloy, and the surface is covered with a lot of heat conductive materials. In this disassembly, we found a total of 39 screws. In general, we can see from the dismantling that vivo has indeed made a lot of efforts in technological innovation, but more importantly, even if the internal structure becomes more complicated and the body has more openings, the vivo still Don't forget to practice water resistance, drop resistance and other functions. Shenzhen Enershare Technology Co.,Ltd , https://www.enersharepower.com