Abstract: This application note discusses how to obtain temperature and humidity data in Thermochron, and record these data in a Microsoft Excel table for graphical display. DS1921G is used to illustrate the implementation of this process.
This article describes how to use OneWireViewer to export data from all iButton temperature / humidity data recorders (DS1921G, DS1921H, DS1921Z, DS1922L, DS1922T, and DS1923) These data are copied to Notepad or Word files and saved as a text file. This file can be imported into a Microsoft Excel spreadsheet to generate a printable chart.
Before reading this application note, you need to understand the related knowledge of OneWireViewer and Microsoft Excel. OneWireViewer is a free program that can be downloaded on the following page: iButton: 1-Wire driver under Windows.
Information on DS192x series devices can be obtained in iButton products: iButton
The computer screenshots in this article are from the DS1921G iButton product, but there are differences between the data loggers, which will be specifically noted in the article. The window of DS1921H and DS1921Z is similar to DS1921G.
The process installs the necessary iButton PC connection hardware. Connect the 1-Wire adapter to the free PC port, and connect the blue read-write head to the 1-Wire adapter. The read-write head is connected to the iButton device for reading and writing. Start OneWireViewer and install the iButton device in the read / write head. Select the correct ROM ID number from the device list (Figure 1). For DS1921G, click on the Thermochron item to open the Thermochron subpage. For other data recording devices, the Thermochron item will not appear on the screenshot. The corresponding subpage should be opened according to the corresponding option. (Not marked in Figure 1).
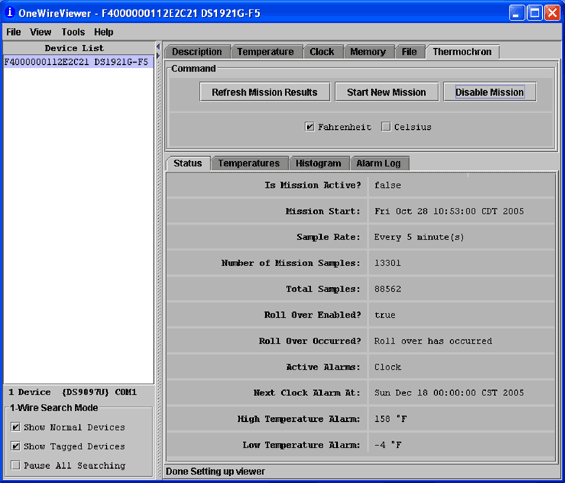
Figure 1. Screenshot of Thermochron browser
Select Fahrenheit or Celsius temperature in the command box. For DS1921G, if the "Is Mission AcTIve?" Item is true, click the Disable Mission button to abort the mission. For other data loggers, the item is "Mission In Process?" There are two lines of labels in the screen shown in Figure 1, located at the upper part and slightly lower. Select the "Temperatures" tab in the lower row. A graph showing the relationship between the temperature and time of the Thermochron recorder (Figure 2) will be displayed.
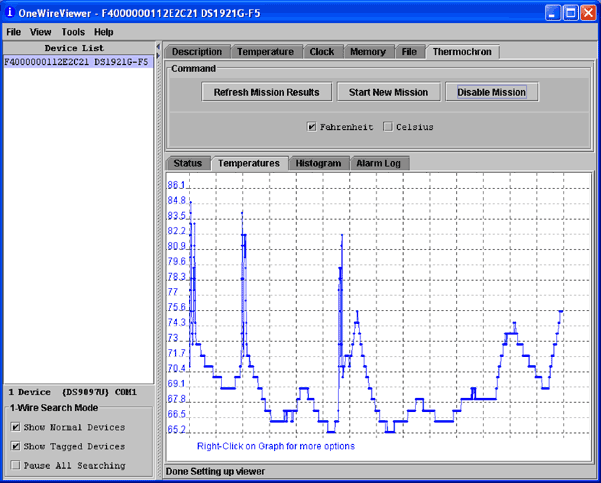
Figure 2. Thermochron temperature time chart
Place the mouse over the chart and right-click. Select "Copy Data to Clipboard with Labels" and click (Figure 3) to save the data on the clipboard.
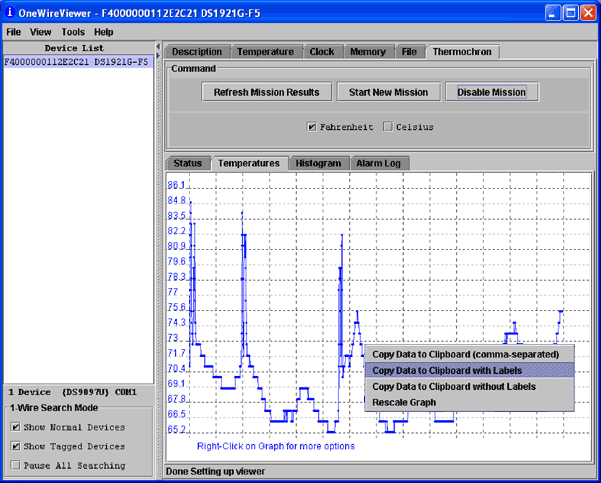
Figure 3. Once you have the data chart, simply click the right mouse button to copy the data to the clipboard.
Use Notepad or Word to create a text file. Copy the data from the clipboard to a text file, and save the text file. If the user uses the European sorting style (eg 77,0), please refer to note 1 at the end of this article. Start the Excel program. Select the "Open" item in the Excel file drop-down menu. Find the directory where the text file is stored, and select "All Files (*. *)" For the file type item. Select the text file and select the "Open" item. The file import wizard page will appear (Figure 4). Before selecting the "Next" button, select the "Delimited" button.
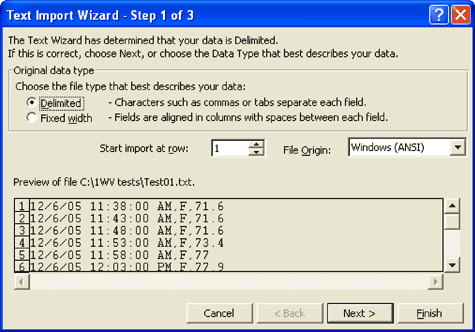
Figure 4. Before proceeding, the text import wizard asks to indicate that your text data is a variable-length file.
Make sure that only the comma or semicolon items are selected in the Delimiters window that appears (Figure 5), and then select the "Next" button.
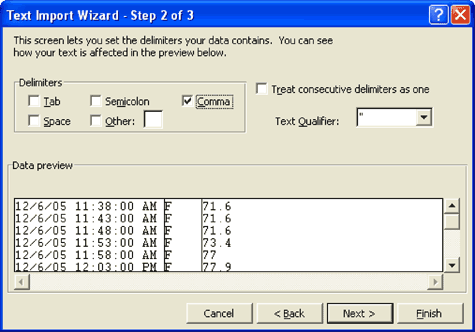
Figure 5. In order for data to be successfully imported into Excel, the file delimiter must be correctly specified with a comma or semicolon.
In the "Column data format" window, select the "Date" item and select the appropriate format. Then click the "Finish" button. (Image 6)
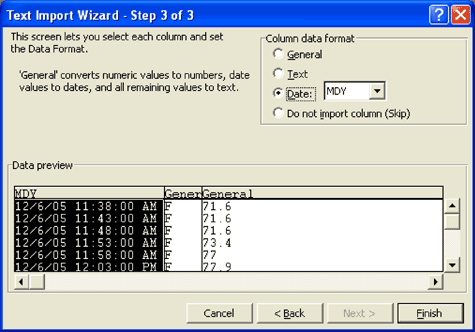
Figure 6. It is important to choose the correct data format, otherwise the data will not be imported correctly.
In Excel operation, the column width can be changed according to personal preference. However, the original data is currently in the correct column for drawing operations.
Data format The first column of the imported data contains the date and time information obtained from the data logger. (Figure 7)
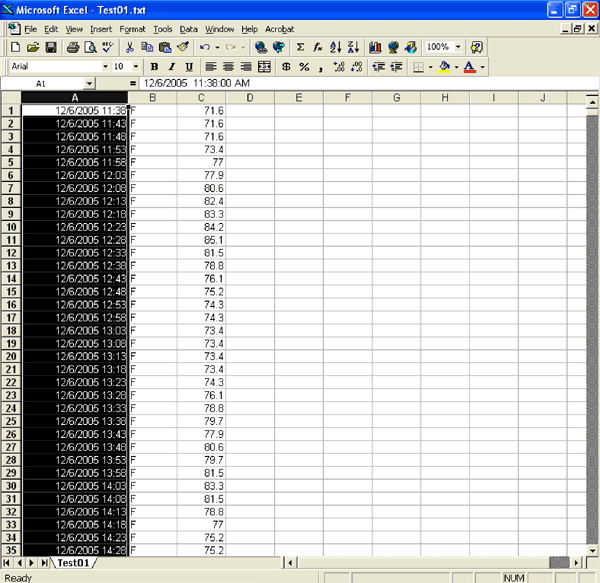
Figure 7. Once the data has been imported into Excel, column A will show the date and time when the data was downloaded.
Column B contains C or F to represent Celsius or Fahrenheit, respectively. This column can be deleted.
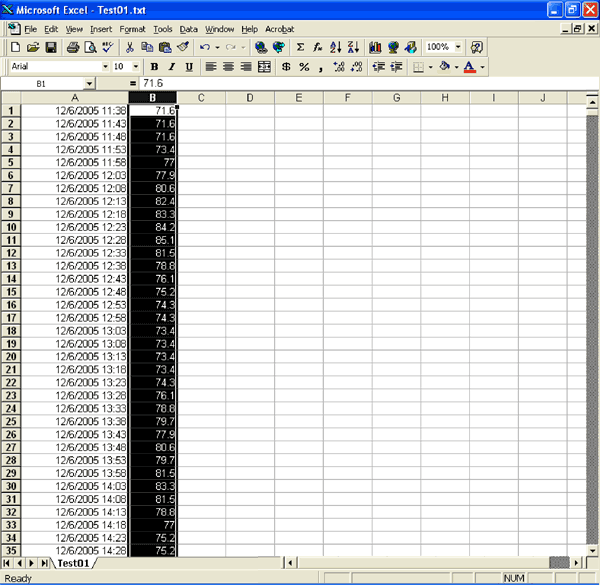
Figure 8. Column B should show your temperature data.
After deleting the Celsius or Fahrenheit column, column B will contain temperature information (Figure 8).
When creating a chart, you should start from the first date and time cell of the chart. Select the cell. A space must be placed in front of the data in the selected cell in the Excel file. (Figure 9)
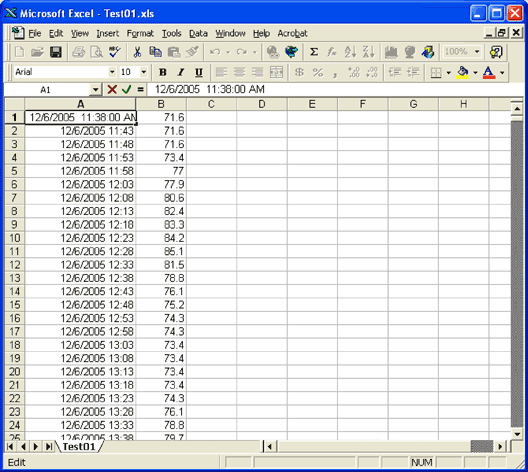
Figure 9. After selecting the cell, you must insert a space before the data and time.
Select the log data to be plotted, and set the time and temperature columns as highlighted columns. (Figure 10)
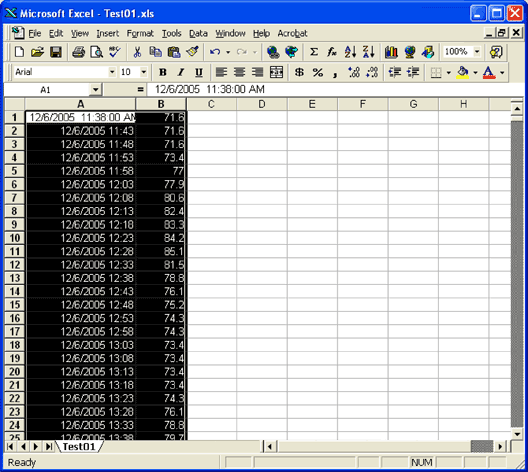
Figure 10. Select time and temperature data for charting.
Select the "Chart" item in the "Insert" directory. (Figure 11)
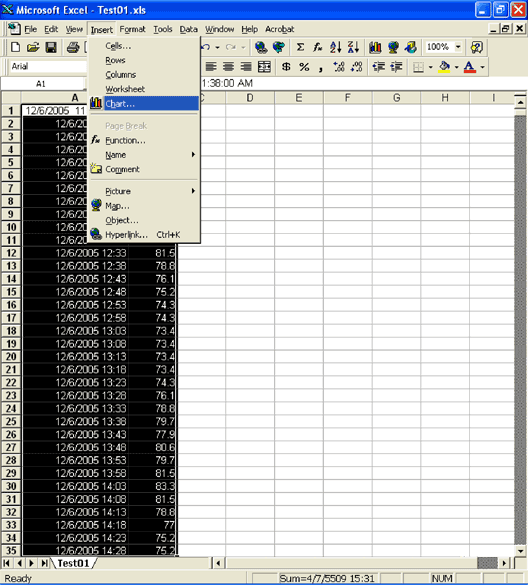
Figure 11. After selecting the data, the chart format must be selected.
In the chart wizard that appears, select the desired chart type. Usually for log data, line charts are more appropriate. (Figure 12)
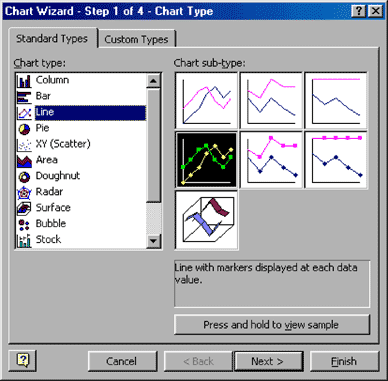
Figure 12. The Chart Wizard provides several chart formats to choose from. Generally choose line chart.
A sample chart will appear on the screen. You can use the chart to check and set the data range. (Figure 13)
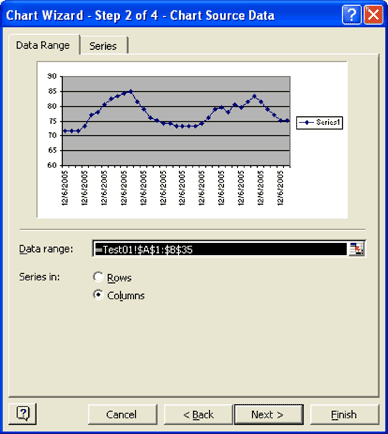
Figure 13. With the example chart, you can preview and check the data.
Add chart options. In this example we add the title and label. (Figure 14)
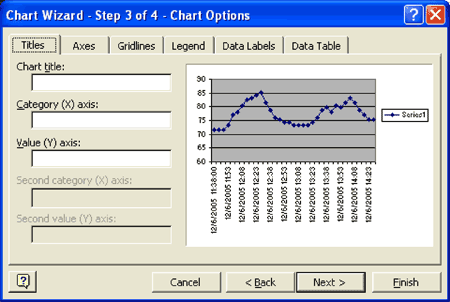
Figure 14. Determine what titles and labels to add to the chart.
The last step (Step 4) in the Chart Wizard is used to set the position of the chart in the spreadsheet. (Figure 15)
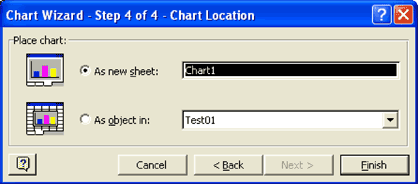
Figure 15. Select the position of the chart in the workbook to complete the chart generation.
If you are already satisfied with the chart and do not make other changes, click the Finish button to create the chart. (Figure 16)
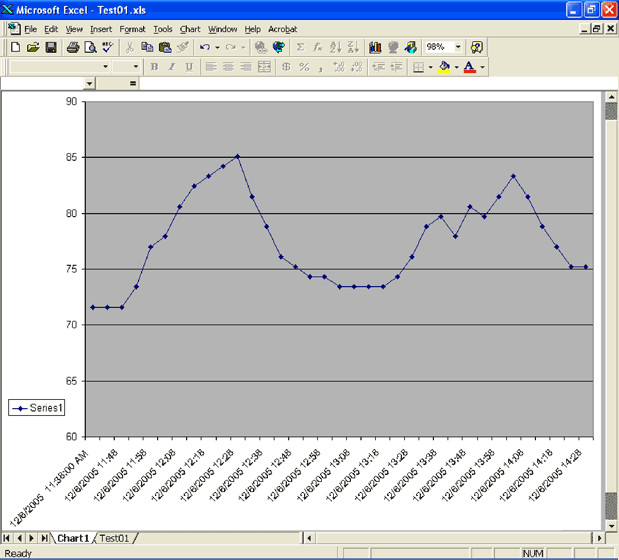
Figure 16. After clicking Finish, you can see the graphical Thermochron data.
Note 1: If you are using the European encoding format (such as 77,0) and the Celsius temperature scale, you should open a text file. Select "Replace" in the "Edit" menu. Type "M, C," in the "Find what" window; then type "M; C;" in the "Replace with" window and click the 'Replace All' button. If you are using Fahrenheit, "Find what" is "M, F," and "Replace with" is "M; F;". Then, when importing the text file, select the semicolon as the separator.
Shaded Pole Ac Motor
Shaded Pole Ac Motor,Ac Shaded Pole Motors,Shaded Pole Motor,Shaded Pole Induction Motor
Changzhou Sherry International Trading Co., Ltd. , https://www.sherry-motor.com