Both the Oculus official and the forum's new post have repeatedly stressed that the Oculus Rift Development Kit 2 is called the developer version 2 generation. Although this tutorial does not say it is for developers (it is estimated that developers do not need to look at it), but at least it requires you Basic understanding and system operation capabilities.
If you just want to plug and play, that is too complicated to debug DK2, low resolution, even the following tutorial are too lazy to read carefully, then please sell your hands to the DK2, which is really need it People, really!
[What to Know Before Installation]
DK2 has a high requirement for computer configuration. If you want to use DK2 to play games and the demo is comfortable and not dizzy due to delay, please follow the following principles:
1, does not support XP! does not support XP!
Do not ask me why, too lazy to explain! Win7, win8, win8.1 can be, as for MAC, tutorials for others to write it.
2, high-performance computer
Because the rendering of the driver runtime is currently not compatible with the notebook dual-card switching technology (Nvidia's Optimus technology and AMD's Dual graphics technology)
The DK2 can only call the core graphics card for rendering processing in the nuclear + alone display notebook, the future driver is still compatible with dual graphics technology is still unknown,
So at this stage you want to play fluently with DK2, you need a high-performance laptop with desktop or dual discrete graphics.
3, the higher the hardware configuration, the better! Especially the video card!
If your machine's performance is normal, then you can only have a smooth running demo. If you encounter a large game or a special light effect scene, you can wait for it.
At present, according to the group friend's test summary, it is recommended to configure NV: GTX760 to start and AMDR9-M280 to start.
4, try not to use Ghost system
Ghost system play DK2 all kinds of wonderful things I can not answer!
[DK2 User Guide]
Well, we officially started.
The DK2's setting is far more complex than the DK1, but as long as you can read and understand the following tutorials carefully, it is not a difficult task to play around with the DK2.
First, the download and installation of the driver
When you unpack your DK2, don't rush to light up its screen first.
Different from the DK1 plug and play method, DK2 needs to install the corresponding driver software on the computer to work properly.
After ensuring that you have a good computer platform, you first need to download the DK2 driver: runtime.
The Oculus official is continuously updating the runtime version. The link to the publishing interface is as follows: https://developer.oculusvr.com/?action=dl&v=21
You can also directly visit the 0.4 website on the 0.4.2 driver download, eliminating the need for official website registration and slow download, download address: http://?id=34
Download the file
If you have installed an older version of the runtime, please remove the old version before installing the new runtime. Otherwise, you may encounter various strange problems.
Right-click the administrator to run the installation program, it is recommended to temporarily shut down the antivirus software, because some group friends reflect the anti-virus software will be false positives.
The installation process is no longer detailed, accept the license terms and all the way to Next, the installation path to select the default path.
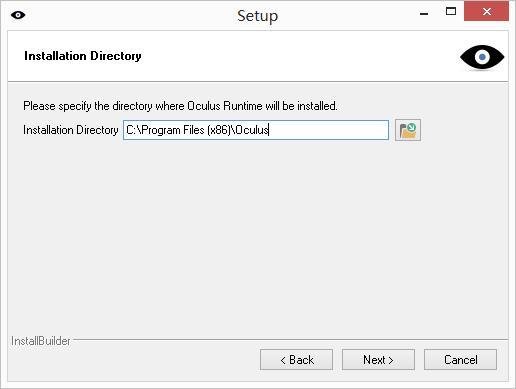
Installation path selection
After the installation is complete, it prompts you to restart your computer. Restart it.
After the restart is completed, first check whether the DK2 related control software and services are started normally. First check the icons in the notification area icon for more small eyes:
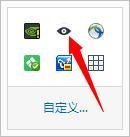
RUNTIME icon
Then check whether the related service process starts normally in the task manager (as shown below)
The 32-bit system starts OVRServer_X86, and the 64-bit system starts OVRServer_X64.
If you do not start normally, you need to install the path to the runtime:
C:\Program Files(x86)\Oculus\Service Manually start OVRserviceLaucher.

Related service processes in Task Manager
If everything is normal, you can go to the next step.
Second, connect DK2
For specific connection methods, refer to the instructions in the DK2 box.
Although it is in English, but if you do not even understand this kind of picture manipulation manual, please re-sell DK2 to developers...
After connecting the DK2 and the position tracking camera, if your device is normal, a yellow indicator will light up on the DK2.
If it is not on, please press the switch on the side of the indicator to test and check if the connection is normal and whether the power supply to the motherboard is normal (DK2 is powered by USB).
Third, use the OculusConfiguration Utility to perform basic settings for DK2
Super focus section, please read carefully!!!
After connecting the DK2, open the Rift Display Mode by left-clicking or right-clicking the small eye icon in the notification area

Turn on Rift Display Mode
In the open window, click on the DK2 working mode ExtendDesktop to the HMD, click Apply, as shown:
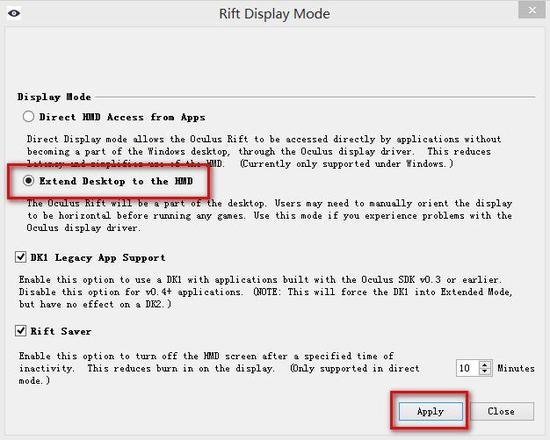
Select working mode
At this time you will find that the screen in DK2 is already lit, and it becomes your computer's extended desktop.
However, you will also find that when the DK2 screen is first recognized as an extended desktop, the screen is vertical (if you did not install the runtime to directly connect DK2 to your computer, you will find it earlier).
At this time, only the desktop right-click menu → screen resolution, click to select the DK2 screen, and then set the horizontal display on it. As shown below:
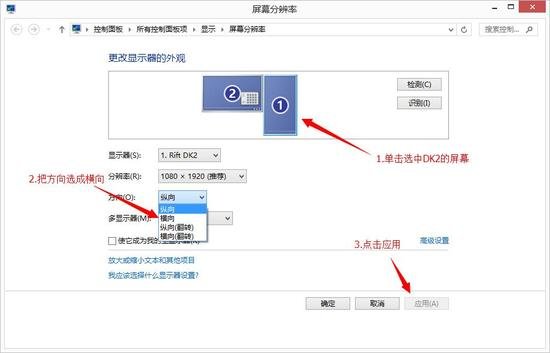
Set Landscape Display Settings Landscape Display
Tucao: This should be the most basic system operation! A little move can be thought out, why do you have to ask every day?
After setting the DK2's screen right, first update the firmware.
Click the small eye icon, click Oculus Configuration Utility, open the DK2 setup software interface.
Select Tools→Advanced→Update Firmware.
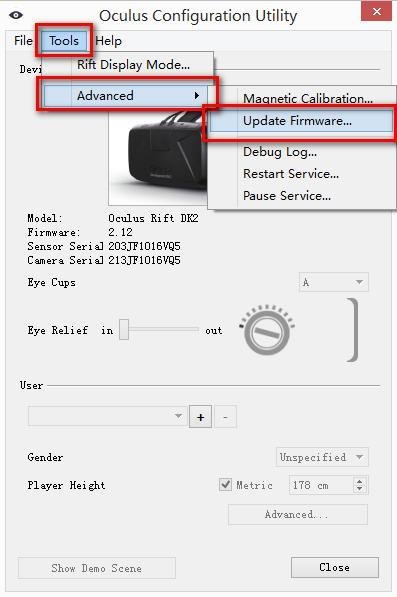
Update firmware interface
Select the firmware file in the popup selection box. The firmware file is in the path of your installation runtime.
C:\Program Files (x86)\Oculus\Tools\Firmware\DK2
As shown below:
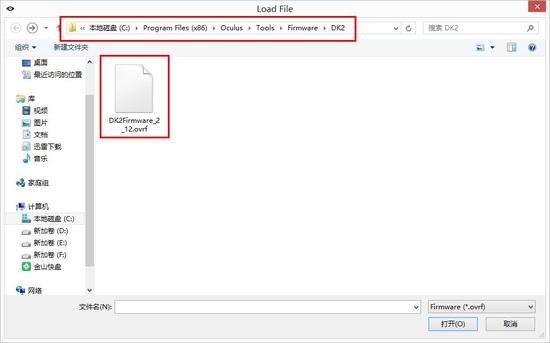
Firmware file path firmware file path
After selecting the firmware, it starts to refresh. Don't disconnect any DK2 connection.
You have to ask if the disconnection will happen? I will not be so dead, you have to die for yourself to do it! If DK2 becomes bricked up, you can write an experience to share with everyone.
After the refresh is complete, open the Oculus Configuration Utility again in C:\Program Files (x86)\Oculus\Tools.
Next you need to set up a user profile.
When not creating a user profile, all options under the Oculus Configuration Utility are grayed out.
First you need to click the "+" under User, add a user profile, and enter your username.
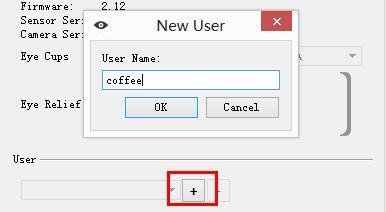
Enter new username
After the user profile is set, the options in the interface can be set. Please refer to the translation of the interface options.
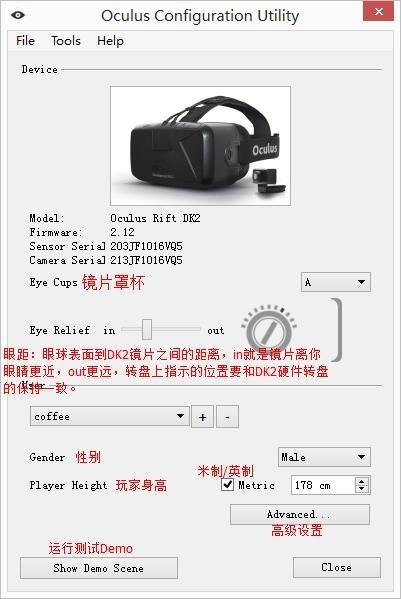
Main interface translation
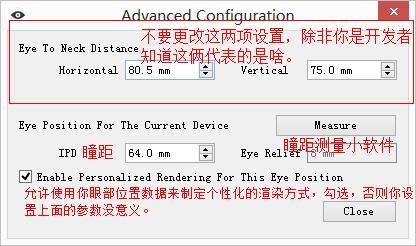
Advanced settings interface translation
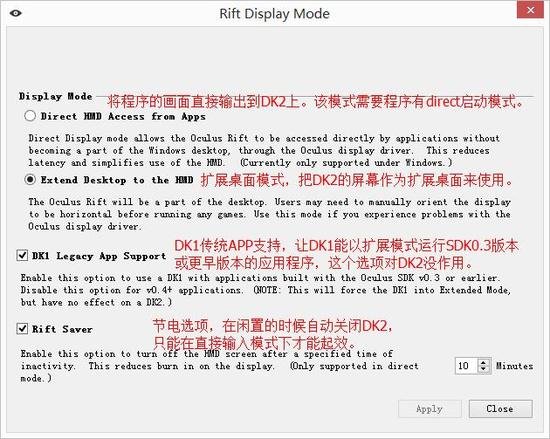
Output mode interface translation output mode interface translation
Fourth, test run comes with DEMO
After you understand the setup options and set the user profile, run your own demo.
According to the feelings in the demo, make adjustments in the settings until you feel the most comfortable.
Comes with DEMO Demo Comes with DEMO Demo
At this point, the basic setup of DK2 is completed.
More exciting VR industry information >>> Please poke in
Mining Equipments
FGI SCIENCE AND TECHNOLOGY CO., LTD , https://www.fgi-tech.com